
 en
en ua
ua es
es de
de pl
pl fr
fr pt
pt it
it nl
nl hu
hu ro
ro sv
sv ja
ja nb
nb sk
sk

 CHAT WITH GODLIKE TEAM


 Sponsorhip
  Our team
  Career
  About Us
  Contact Us
 How to make a Satisfactory Server?
- 4 min read
- 1803
- 0

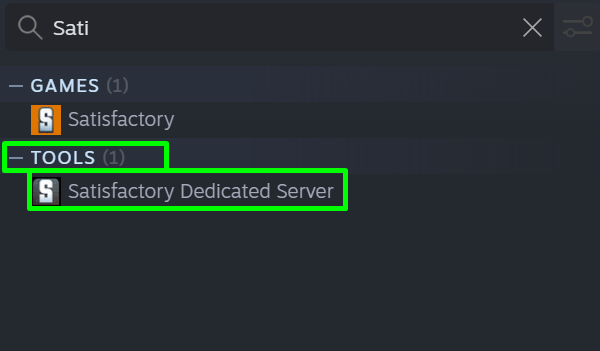
Installing Satisfactory server
Installation Satisfactory server via the Steam client:
You can install the server from your Steam library, just like any other game. You may need to change the filters in your Steam library to find the Tools section.
NOTE
You can still use SteamCMD to download and install the files without needing a Steam account, but the process will take longer than a normal Dedicated Server tool download
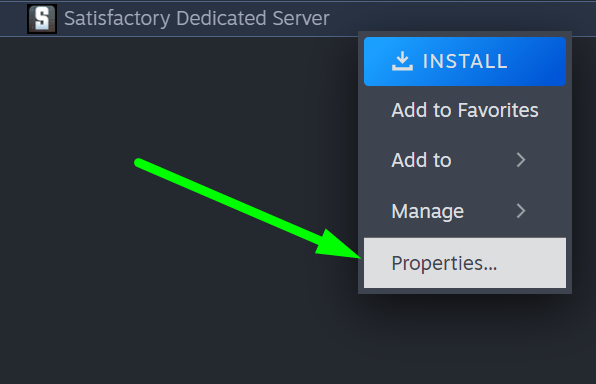
If you want to use the Satisfactory Dedicated Server Experimental Update instead of the main Early Access release, go to your Library account's Properties, click the Betas tab, and make sure that the Experimental Beta branch is selected. To revert to the main version, reverse these steps.

TIP
If you're using the Epic Games launcher, you can also install the Satisfactory Dedicated Server tool in your Epic Games library, just like on Steam
Start Satisfactory server
Launch Satisfactory Dedicated Server from the Steam library. A terminal window will open where you can view logs (information) in real time. If after a while the window stops showing information, it usually means that the server is working and waiting for a connection.
Satisfactory server Configuration
The initial configuration is done in the game by the first player who connects to the server, and basically consists of giving the server a name and assigning a password for administration. More settings are available through the server manager in the game. The server does not run any games on its own. The administrator needs to create a game using the game interface. By default, player password protection is not enabled, but a player password can be set through the same interface.
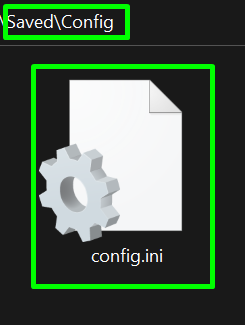
By default, the ini extension files for the server are located in the Steam server installation directory, at this path:
.\steamapps\common\SatisfactoryDedicatedServer\FactoryGame\Saved\Config
These files cannot be generated until the server is shut down using the "quit" console command after the first power-on.
Satisfactory server log file
The server keeps a running log of all messages it displays on the console lines. The logs are updated when the server starts, with the last (current) log named FactoryGame.log, the next log named FactoryGame_2.log, and the rest named after the date-time pattern (FactoryGame-backup-DATE-TIME.log). These logs are stored in the server installation directory, then in the subdirectory FactoryGame/Saved/Logs.
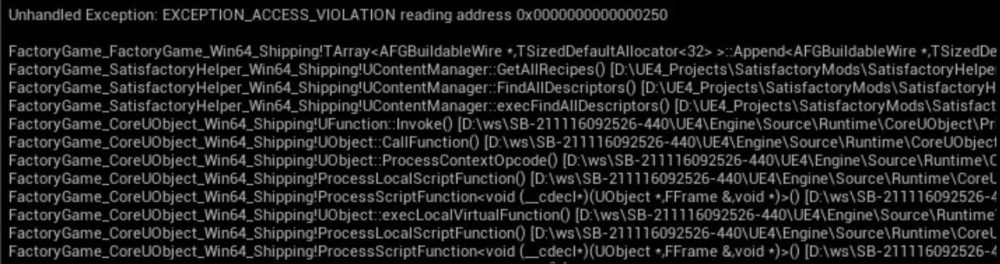
The server - if it is so configured (it is by default) - also saves dumps (logs) of all crashes that it manages to save. They are saved in the server installation directory, then in the subdirectory FactoryGame/Saved/Crashes, and a separate folder with a randomly generated UUID is created for each crash report.
The game client works similarly, but crash logs and dumps are stored in the user's AppData directory, along with the saved files.
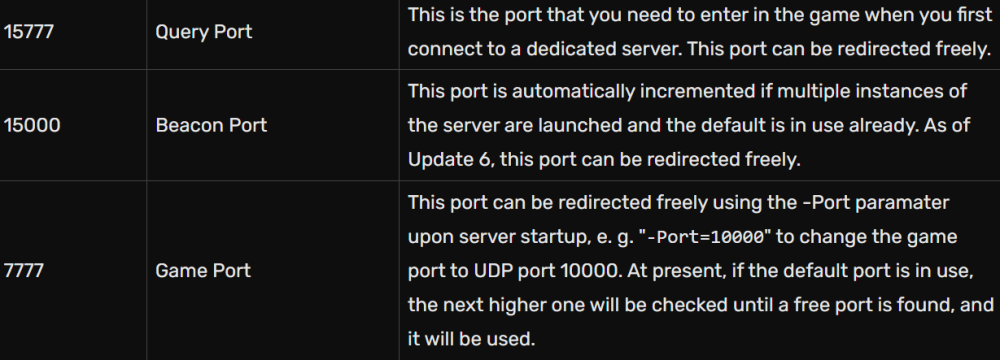
Satisfactory Dedicated Server settings up port forwarding and firewall
Before you get started, you need to make sure that the following ports are available on your server, so you may need to create firewall rules or configure port forwarding in your router, depending on your setup.
Port forwarding is not currently supported, so the ports you open in your router must match the following. Each of these ports can be overridden with a parameter, as shown in the table below:
If you want to know how to join a dedicated server, check the article.
Now that you are familiar with installing, running, and layering Satisfactory, we wish you an interesting and convenient experience in managing your server. Have fun playing with GODLIKE.
