
 en
en ua
ua es
es de
de pl
pl fr
fr pt
pt it
it nl
nl hu
hu ro
ro sv
sv ja
ja nb
nb sk
sk

 CHAT WITH GODLIKE TEAM


 Sponsorhip
  Our team
  Career
  About Us
  Contact Us
 How to create a Vintage Story server?
- 3 min read
- 2436
- 2

Vintage Story server setup
Using Vintage Story server hosting to temporarily play multiplayer, open the world for one player, and then, while in the game and opening the menu, click on Open to Lan.
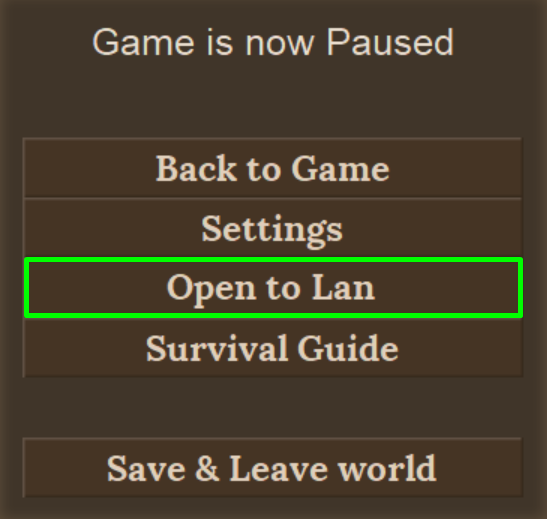
This will allow players to join your game over the local network. If you want to allow players outside of your local network to join, you can also click on Open to Internet, which will attempt to establish an external connection to join your server from the Internet. This is done using a technology called UPnP, which should be enabled on your internet router, which is often the default. If it is not, you will need to configure "port forwarding" on your Internet router.
NOTE
Google "Port Forwarding" with the name or model of your Internet router to learn more
For Vintage Story server working, your single-player world must be left open (you need to be logged in).
Vintage Story dedicated server
In addition, Vintage Story comes with a dedicated server program that you can start and leave permanently without having to log in yourself.
To start a Vintage Story dedicated server
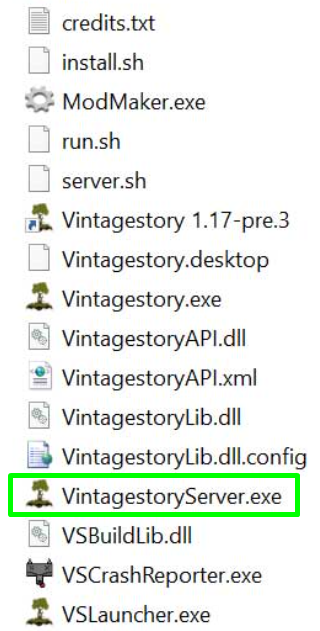
1) Open the folder where the game is installed.
2) Find the VintagestoryServer.exe file and run it.
Updating servers
If you want to install a newer version of the game for the server, first uninstall all installation files, only then you can download the update for the game from the official website.
IMPORTANT
Make sure you have saved your game worlds
Basic Vintage Story server configuration
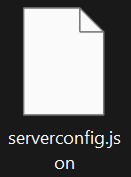
Once your Vintage Story server is running, you can configure the server while it is running using commands or by editing the serverconfig.json file (to edit the serverconfig file, the server must first be stopped). On Windows, this file is located at .../VintageStoryData/serverconfig.json by default.
Below are some of the configurations that can be set using the commands:
/serverconfig upnp [0|1] - if you specify one, the game server will try to configure port forwarding for you;
/serverconfig name Peaceful PvE Server - sets the name of the server that will be visible in the list of public servers;
/serverconfig description - configures the description of the server that will be visible in the public list of servers;
/serverconfig motd Hi {playername}! Please remember to follow the rules! - a message that is displayed to players when they join your server;
/serverconfig password 123qwe - prompts players for a login password, if set. Use /serverconfig nopassword to remove the password again;
/serverconfig advertise (1|0) - add your server to the public list (1) or not (0).
Use Vintage Story server commands for administrator rights
If you have access to the server console, enter /op Playername. If not, open the serverconfig.json file and replace "StartupCommands": null with "StartupCommands": "/op Playername".
IMPORTANT
In both cases, you must replace Playername with your real player name
Now you can create your own Vintage Story server or other games and invite your friends or other players. Play together with GODLIKE.
