
 en
en ua
ua es
es de
de pl
pl fr
fr pt
pt it
it nl
nl hu
hu ro
ro sv
sv ja
ja nb
nb sk
sk

 CHAT WITH GODLIKE TEAM


 Sponsorhip
  Our team
  Career
  About Us
  Contact Us
 How to create a Quake Live server?
- 5 min read
- 1674
- 0

Installing the Steam console
The Quake Live server is installed and updated by SteamCMD, a command-line console (terminal) used to install Steam-related files.
1) Create a folder for SteamCMD
2) Create a folder for the future server.
3) Download SteamCMD for Windows.
4) Unzip the contents of the zip file to the folder you created for steamcmd.
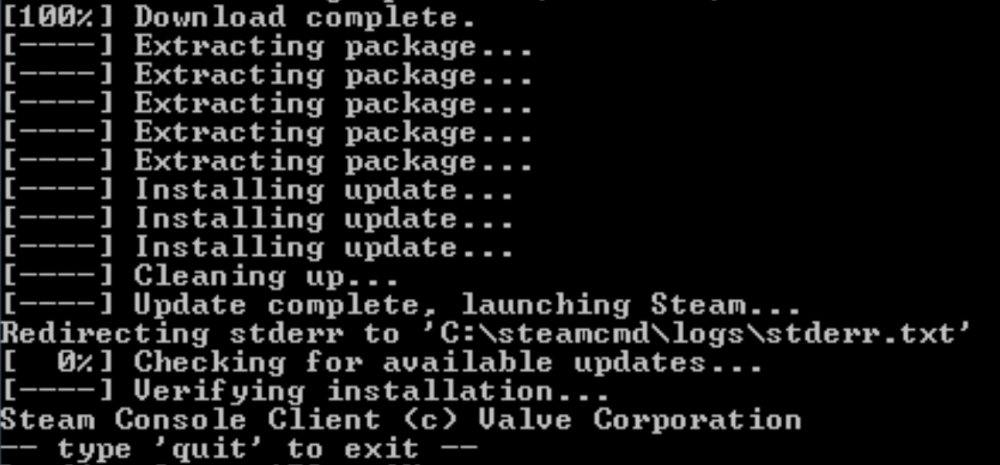
5) Run the steamcmd.exe program (your computer may ask you to confirm that you want to run it).
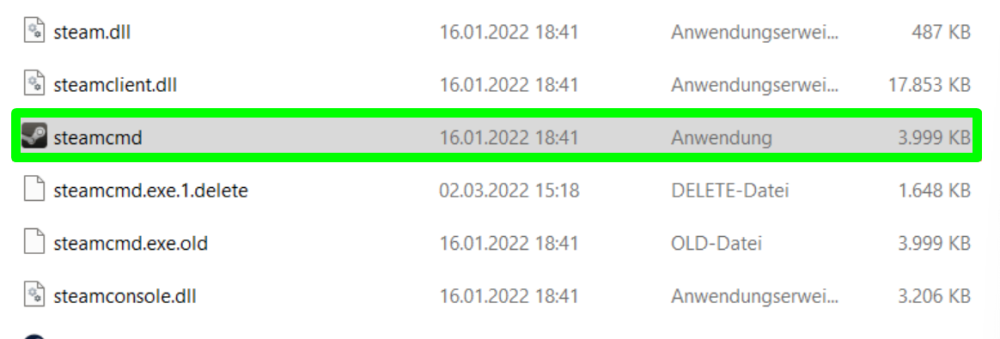
6) Once launched, this file will be downloaded, installed, and updated to the latest version of SteamCMD.
Setting up a dedicated server for the game
1) In the console prompt, enter the following commands one by one (press Enter after each):
force_install_dir "The path to the folder with your server"
login "Your Steam login"
password "password"
app_update 282440 validate
app_update 1007 validate (installing SteamWorks SDK Redist)
quit
Enabling Steam support
In your SteamCMD directory, locate the steamapps\common\SteamWorks SDK Redist folder and copy all DLL files to the steamapps\common\Quake Live folder to enable Steam support.
Setting up the server
Go to ...steamapps\common\Quake Live\baseq3, you will see the following two files:
access.txt

server.cfg

Edit the contents of these files as you wish, and then add the following to the bottom of the server.cfg file:
set sv_pure "0"
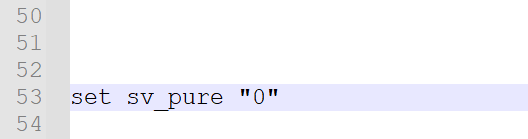
This is necessary to prevent the error "Unpure client detected" from occurring.
Do not comment out the net_ip line or set it. It contains a bug and leads to unexpected results, one of which is that the server does not appear in the list of Steam servers and does not accept connections
Start the server
At the command prompt, type the following command to get your server up and running:
quakelive_steam.exe +set dedicated 1

To start a server with proper Steam support, use this command instead of the previous one:
start /wait /abovenormal quakelive_steam.exe +set dedicated 1

This will do the trick: the dedicated server will be up and running, and with proper Steam support.
How to restart the server? Resolving the "100% core utilization" error
This error occurs when the server remains active for too long. The server will use one core 100% even if it is inactive, thus overloading one of the cores.
An easy way to prevent this is to automatically restart the server every 24 hours. Below is a simple batch script to shut down the server every 24 hours:
@echo off
cls
title Automatic Quake Live 24 hours Server Restarter
:a
echo Closing the server in 24 hours
timeout 86400
echo 24 hours passed, sending quit message to server process
taskkill /IM quakelive_steam.exe
echo Quit message sent
goto a
This script should be used in conjunction with the automatic restart script. Below is a simple automatic restart script:
@echo off
cls
title Automatic Quake Live Server Restarter
:a
timeout 10
echo Starting the server
start /wait /abovenormal quakelive_steam.exe +set dedicated 1
echo Server closed for some reason, restarting in 10 seconds
1goto a
This will be the main script that starts the Quake Live server. This way, when another script shuts down the server every 24 hours, the main script will automatically restart it after 10 seconds.
The message "Quake Live has stopped working"
The server can stop working/fail for a variety of reasons. It just happens, as it can happen with many other game servers.
The problem is that when the server goes down, a window appears on your server with the message "Quake Live has stopped working". This message waits until the user clicks the "Close Program" button.
When this message appears, your autorun script stops working and does not detect the failure until the user clicks the "Close Program" button.
Therefore, we need to disable this message. To do this:
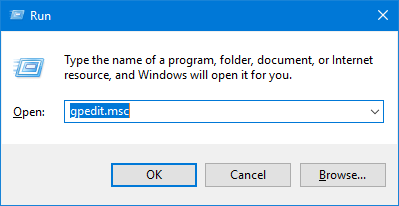
1) Open the local Group Policy Editor (gpedit.msc) by pressing Win + R and type "gpedit.msc".
2) Click on Computer Configuration or User Configuration.
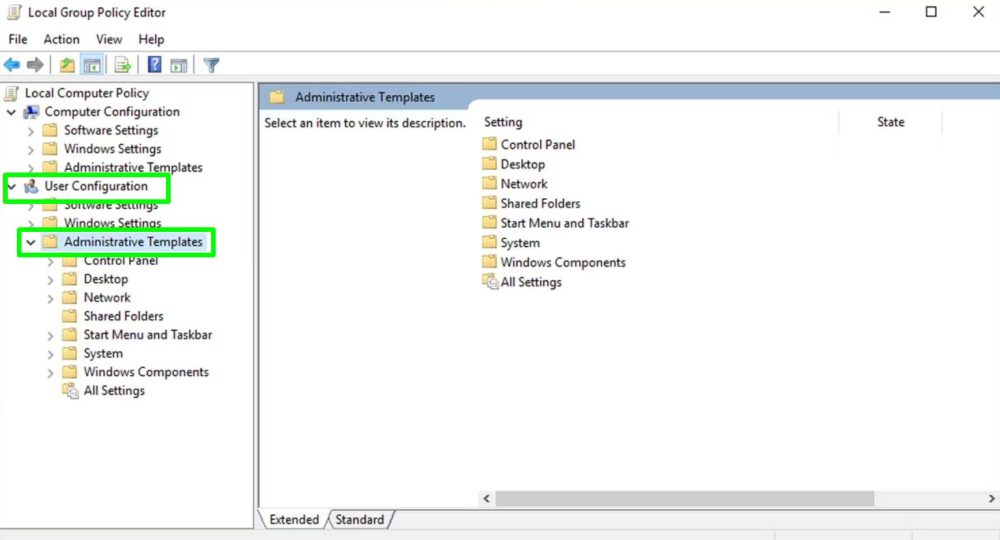
3) Click on Administrative Templates.
4) Click on Windows Components.
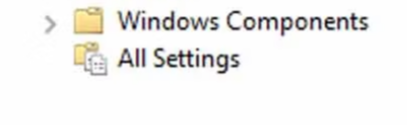
5) Click on Windows Error Reporting.
6) In the right column, double-click Prevent display of the user interface... .
7) In the new window that appears, select Enabled and click OK.
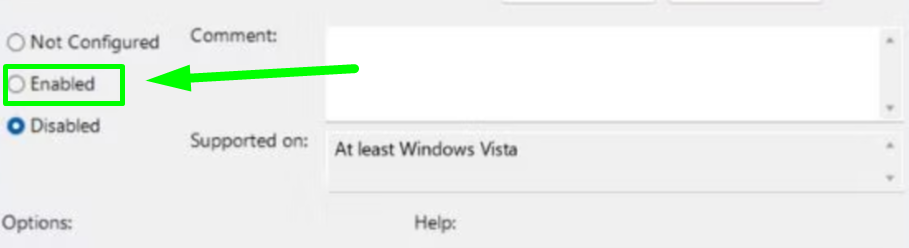
8) Close the Local Group Policy Editor. You're done!
If you want to know how to start a Quake Live server check the following article.
Congratulations, now you are ready to create your own server for the cult shooter, we wish you a dynamic and fun gaming experience! We will help you with any setting up on Quake Live server! Play together with GODLIKE.
