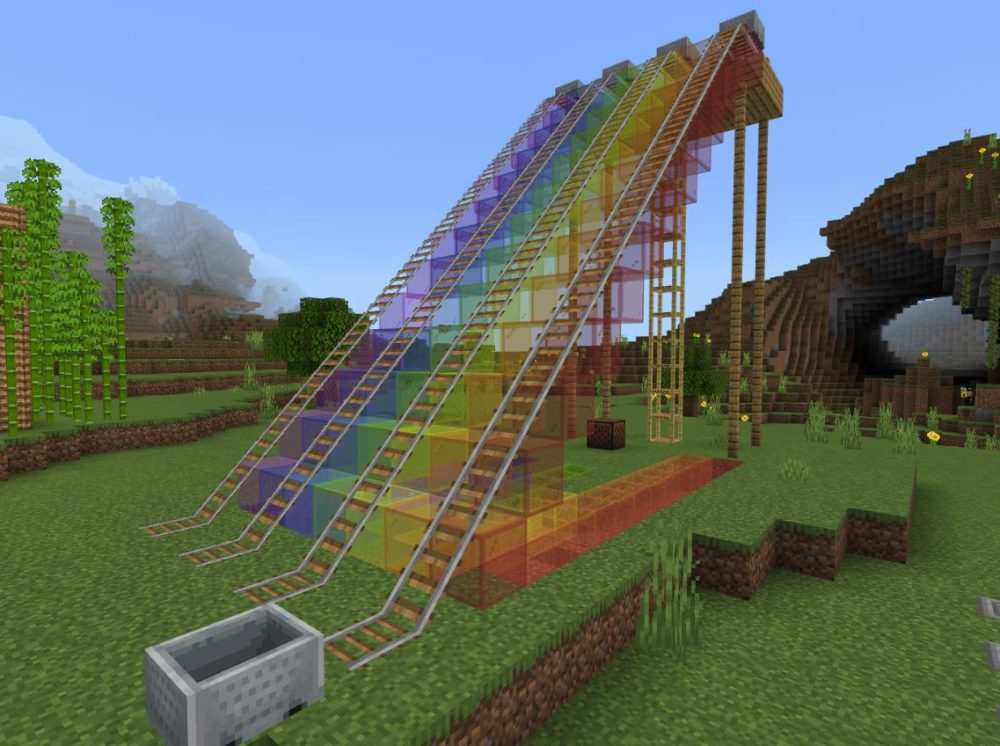
In the expansive world of Minecraft server hosting, efficient transportation is key to exploring and managing your creations. And if you’re running your adventures on bmc4 server hosting, building large-scale rail systems becomes smoother and more reliable.Rails serve as the backbone for minecart systems, enabling swift and organized movement across vast distances.This guide will walk you through crafting various types of rails and offer insights into their optimal use.
To craft regular rails, open your crafting table and place the materials as follows:
Fill the first and third columns with iron ingots (three in each).
Place the stick in the center of the grid.
This will give you 16 standard rails. These are the basic building blocks for any railway system and can be placed on most solid blocks to form continuous tracks for minecarts.
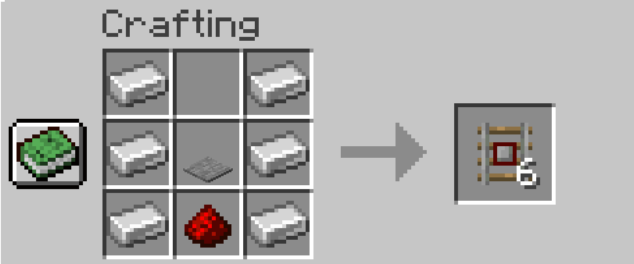
Powered rails are crucial if you want to add speed and automation to your minecart system. Here’s how to make them:
Put gold ingots in the first and third columns.
Place the stick in the center slot.
Add redstone dust to the bottom-middle slot.
This recipe yields 6 powered rails. When activated by a redstone signal (like a redstone torch or lever), these rails will push your minecart forward. If they’re not powered, they will act like brakes and slow the cart down.
Detector Rails
Materials Needed:
6 Iron Ingots
1 Stone Pressure Plate
1 Redstone Dust
Detector rails can be used to create smart rail systems that react to a passing minecart. To craft them:
Fill the outer columns with iron ingots.
Place the stone pressure plate in the center.
Put redstone dust in the bottom-center slot.
This will give you 6 detector rails. These rails act like pressure plates that detect when a minecart passes over them and send a redstone signal—perfect for automating doors, lights, or traps.
Activator Rails
Materials Needed:
6 Iron Ingots
1 Stick
1 Redstone Torch
Activator rails are designed to trigger certain actions in minecarts, like ejecting passengers or igniting TNT minecarts. To make them:
Place iron ingots in the first and third columns.
Add the stick in the middle.
Put the redstone torch in the bottom-center slot.
You’ll get 6 activator rails. These are useful in advanced rail systems where specific actions need to be triggered automatically.
Tips for Using Rails Efficiently
Use Powered Rails Wisely: To keep your minecart moving without losing momentum, place a powered rail every 8–12 blocks on flat ground.
Climbing Slopes: When building uphill tracks, powered rails are essential to maintain speed.
Curved Rails: Rails automatically curve when placed adjacent to each other at angles. Use this to your advantage when designing corners and intersections.
Redstone Control: Combine redstone switches or pressure plates with powered or detector rails for full control over your track system.
With the right combination of these rail types, you can design everything from simple transport systems to fully automated rollercoasters.
FAQ
How do you craft rails in Minecraft?
Rails are crafted with 6 iron ingots and 1 stick, which gives you 16 rails per craft.
How do powered rails work?
Powered rails boost minecarts when they receive a redstone signal, and they can also slow a cart down if the rail is unpowered.
What’s the difference between detector rails and activator rails?
Detector rails output a redstone signal when a minecart passes over them. Activator rails trigger special minecart effects, like ejecting a rider or activating a TNT minecart.
Do rails break and drop back as items?
Yes. When you break rails (including powered/detector/activator rails), they drop as items so you can pick them up and reuse them.
Do rails work the same in Java and Bedrock Edition?
The crafting recipes and basic rail behavior are the same in both editions, so your track builds transfer cleanly between Java and Bedrock.
Result
Rails in Minecraft can be crafted using simple materials at a crafting table. Standard rails require 6 iron ingots and 1 stick, arranged with iron on the sides and the stick in the center, yielding 16 rails. Powered rails need 6 gold ingots, 1 stick, and 1 redstone dust, producing 6 rails. For detector rails, combine 6 iron ingots, 1 stone pressure plate, and 1 redstone dust, while activator rails are made using 6 iron ingots, 1 stick, and 1 redstone torch.
Enjoyed reading this article? Check out our Blog section to discover even more fascinating insights about your favorite games! Play together with GODLIKE.
Fawn
Minecraft Writer
Hi, I'm Fawn. I started out just messing around in Minecraft with friends, then one thing led to another, and suddenly I was streaming, building worlds, and losing sleep over redstone logic.
I like games that make you feel something—whether it’s a good RPG story like Nier or Kingdom Hearts, or the collective suffering of solo-queuing in Valorant.
Mostly, I just create, experiment, and have fun with it :D
Important Note: Godlike.host is our own service. This ranking is editorial (not paid placement) and follows the scoring criteria shown below. Always verify current plan limits, pricing, and regions on each provider’s website before purchasing….
TL;DR If you want one seed that feels like a complete starter world, pick Cherry Valley Trio (Seed: 608548899648438462) for villages, deep structures, and a strong exploration route.If you want a dramatic build location with…
Ultimate Minecraft Diamonds Mining Guide Why are diamonds so wanted by many? Minecraft Diamonds – shiny blue gems in the world of Minecraft that also happen to be the ore required to have the best…
 en
en