
 en
en ua
ua es
es de
de pl
pl fr
fr pt
pt it
it nl
nl hu
hu ro
ro sv
sv ja
ja nb
nb sk
sk

 CHAT WITH GODLIKE TEAM


 Sponsorhip
  Our team
  Career
  About Us
  Contact Us
 How to run a dedicated ARK:Survival Evolved server?
- 3 min read
- 992
- 4
Run your ARK dedicated server! Embarking on an adventure in ARK: Survival Evolved is always better with friends. With Godlike.Host, the process is simpler than you might think. This guide will walk you through the steps to set up and run your dedicated ARK server, ensuring an unforgettable gaming experience for you and your fellow survivors.
Step 1: Signing Up and Logging In
Begin by visiting the Godlike.Host website and creating an account. Fill in your details, choose a strong password, and confirm your email. Once you're logged in, you're ready to dive into the exciting world of dedicated ARK servers.
Step 2: Selecting Your Server Plan
On your dashboard, explore the available server plans. Godlike.Host offers a range of options to fit your preferences and player count. Choose a plan that aligns with your envisioned ARK adventure, keeping in mind the number of players and the desired server location.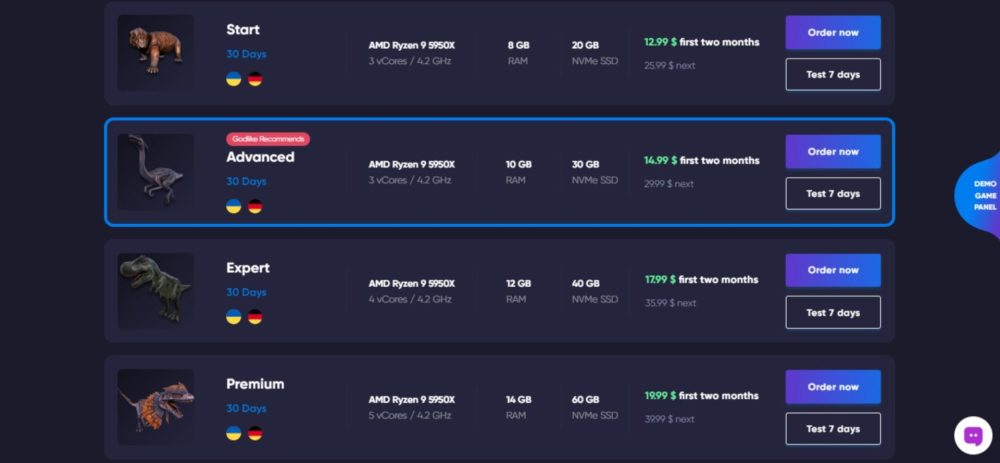
Step 3: Customizing Your Server
Now comes the fun part – customizing your server! From the dashboard, navigate to the server settings. Here, you have the power to adjust various aspects of gameplay, including rates, rules, and mods. Fine-tune the settings to craft your ideal ARK world where dinosaurs and survival rules bend to your will.
Step 4: Installing Mods (Optional but Exciting)
Enhance your server's gameplay by adding mods. Godlike.Host offers an easy-to-use mod manager that simplifies the process. Choose from a treasure trove of mods to add exciting features, new creatures, and engaging challenges to your ARK experience. Mods are your ticket to endless creativity.

Step 5: Inviting Players to Your Realm
Your ARK world is ready, and now it's time to invite your friends and fellow players. Share the server name, IP address, and any required passwords. As the host, you get to shape the community and camaraderie that develops within your unique ARK universe.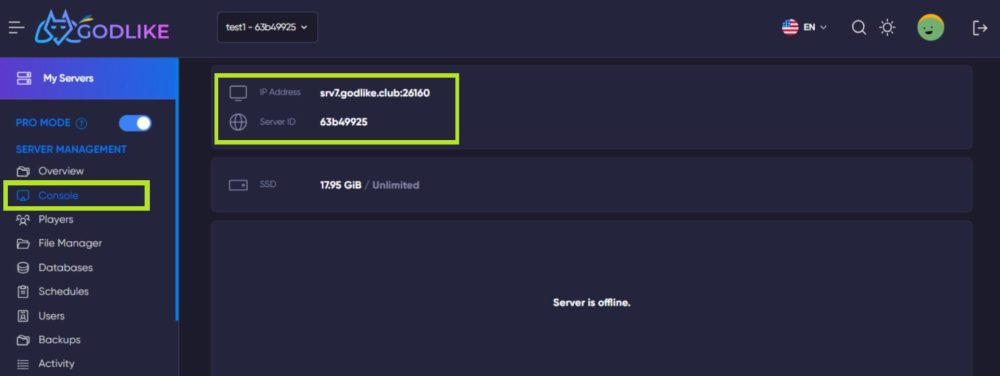
Step 6: Managing and Monitoring
As the proud owner of a dedicated server, you wield administrative power. Monitor player activity, enforce rules, and ensure a smooth experience for everyone. Godlike.Host equips you with tools to manage updates and address any hiccups that may arise on your ARK journey.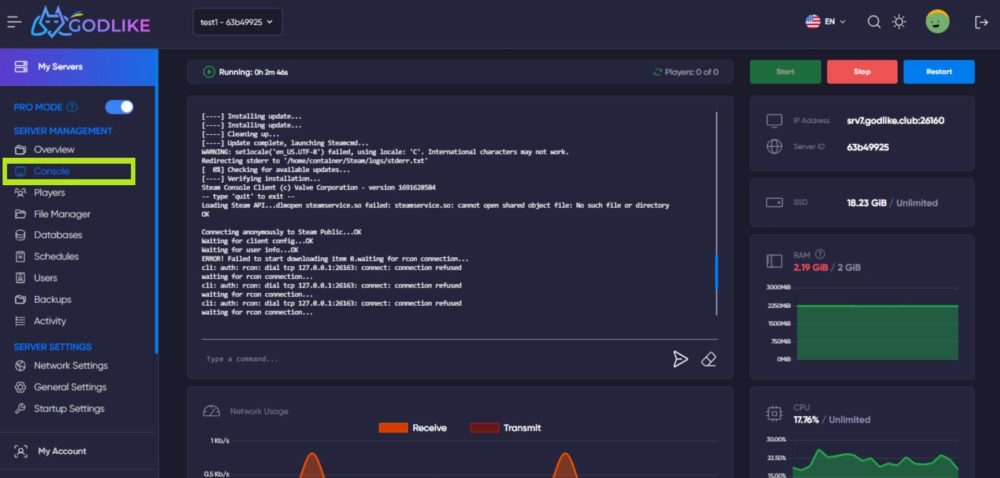
Run a dedicated ARK server with Godlike.Host since it is not just about hosting a game; it's about creating a world where imagination knows no bounds. By following these steps, you'll unleash your inner game master, crafting an ARK adventure that's uniquely yours. Whether you're building alliances or testing your survival instincts, a dedicated server ensures that your journey through the prehistoric wilderness is as exhilarating as it is customizable. So, gather your friends, brace for the unknown, and get ready to embark on a thrilling ARK experience like no other!
