
 en
en ua
ua es
es de
de pl
pl fr
fr pt
pt it
it nl
nl hu
hu ro
ro sv
sv ja
ja nb
nb sk
sk

 CHAT WITH GODLIKE TEAM


 Sponsorhip
  Our team
  Career
  About Us
  Contact Us
 How to make a modded Minecraft server?
- 3 min read
- 7010
- 11
Millions of gamers who use modded Minecraft server hosting all over the world are enamored with the game Minecraft. Minecraft has become even more fascinating thanks to mods for Minecraft, since it enables players to build and explore a universe of limitless possibilities. You've come to the correct place if you want to use Godlike.host to set up modded Minecraft server. We'll outline how to make a modded Minecraft server utilizing Godlike.host in this tutorial, step-by-step.
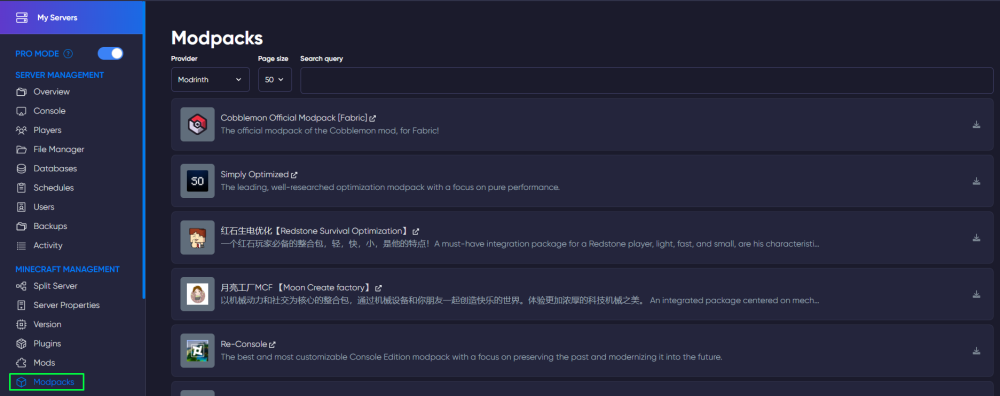
Step 1: Choose a better Minecraft modpack
The first thing you have in order to setting up a modded Minecraft server to do is choose a Minecraft modpack to be placed on your game server. You can get a huge selection of modpacks on the widely recognized website mods for Minecraft, Modrinth vs CurseForge. Write down the name and version of the modpack you've selected.
Step 2: Sign Up for Godlike host.
The next step is to create an account on Godlike.host. After logging in, click the "Create Server" option to start a new server. When choosing a server type, pick Minecraft and then the version you wish to play on.
Step 3: Forge install
After making your server, you must set up Forge, a modifying platform that lets you to install and run modules on your game server. On the official website, Forge's most recent version may be downloaded. After downloading, upload the Forge server jar file to your server using a File Transfer Protocol (FTP) client or the file administrator in your control panel. Explore our guide on how to install Forge.
Step 4: Install the Minecraft Modpack
The Minecraft modpack you decided on in step 1 can now be installed. Use Godlike.host's "Mod Manager" tool to do this. Navigate to "Mod Manager" and then "Add Modpack." Input the desired modpack's name and version number, then click "Add Modpack." After adding the modpack, choose it and choose "Install."
Step 5: Configure Minecraft Server Settings
The server configuration step must be done after installing the Minecraft modpack. To do so, select "Settings" and then "Server Settings." You may set the server name, the number of players that can play at once, and the degree of difficulty here. A whitelist, ban list, and other security options are also available. 
Step 6: Start Minecraft Server
The "Start Server" button on Godlike.host may be used to launch your server now that everything has been configured. Players may now connect to your modified Minecraft server by entering its IP address. 
You should give it a go!
It is quite easy to setup a modded Minecraft server using Godlike.host, although it does require some technical expertise. By using the techniques in this article, you should be able to create a personalized Minecraft server that you and your friends may use to play for hours. Enjoy exploring all the game's potential changes may provide, all the while keeping your server secure and up to date.
