
 en
en
 CHAT WITH GODLIKE TEAM


How to Set Up a VPS Server: A Step-by-Step Guide
- 10 min read
- 56
- 1

Greetings, Godlikers! Moving to a Virtual Private Server (VPS) is a decisive step for any growing online project. If your website, app, or service has started to “choke” on regular shared hosting, and the need for flexibility, control, and higher performance has become obvious, a VPS is a logical and powerful solution. It offers you an isolated environment with guaranteed resources, full system access (root access), and the ability to configure everything exactly the way you need. However, unlike managed hosting, initial setup and basic VPS security rest entirely on your shoulders. This process may seem complicated for beginners, but there’s no need to worry. This article is a step-by-step guide that will walk you through all the key stages of setting up your new server: from the first secure connection to creating users and configuring basic firewall rules. By following these instructions, you will lay a strong and secure foundation for the stable operation of your project.
Introduction: What is a VPS and why use it?
A VPS (Virtual Private Server) is your own virtual server running on powerful data center hardware. You receive a share of resources that belong only to you: CPU, RAM, disk space, and a dedicated IP address. Why do you need a VPS? Because with full control, you decide what to install and how to configure your server. A VPS is ideal if shared hosting is no longer enough, but you don’t yet need an expensive dedicated server. It’s the optimal choice for online stores, corporate websites, games, or any projects where speed and stability are crucial and regular hosting can no longer cope.
Choose a VPS hosting provider and plan
Just insert a promo text here about our service and how great it is to buy a VPS from us.
Prepare to connect to the VPS
After you purchase the plan you need, your server will be waiting for basic initialization, meaning you’ll choose which Operating System to install and select the required amount of swap space. To start, you need to choose a name for your server, which you will see in your control panel, but you can also simply click the “Random” button and a name will be generated. After that, it’s recommended to select the Time Zone, which will be automatically configured on your server, and if you wish, you can immediately enter the Hostname (the server name that will be displayed when you connect to it).
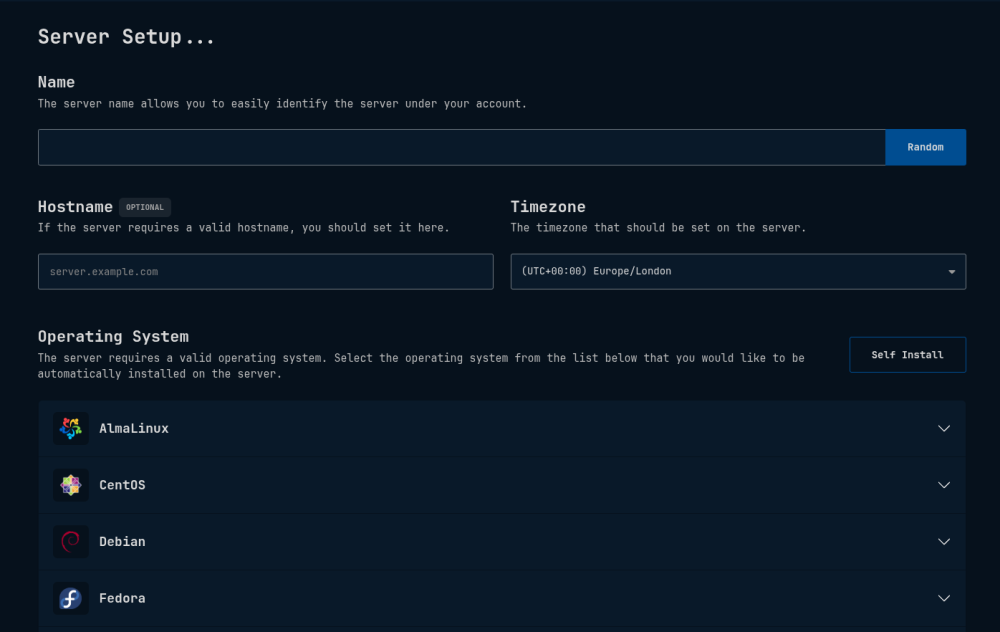
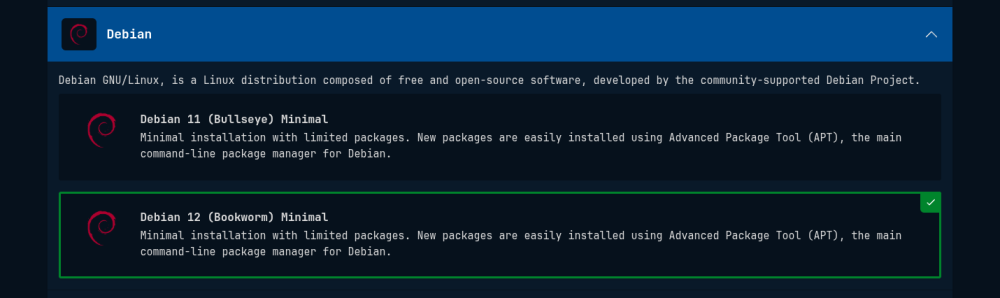
Next, we need to choose the operating system that will be deployed on your server. To do this, just select one from the list below. If you don’t understand which one to choose, that’s okay—you can read about each of them online and pick the one you prefer. For example, we will choose Debian:
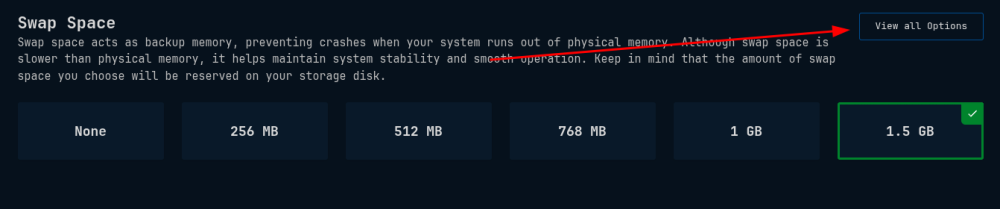
After selecting the operating system, you will see an option below to choose the size of Swap—this is your backup memory, which is used as your RAM fills up. It’s better not to skimp on this parameter, so we will select the maximum available value:
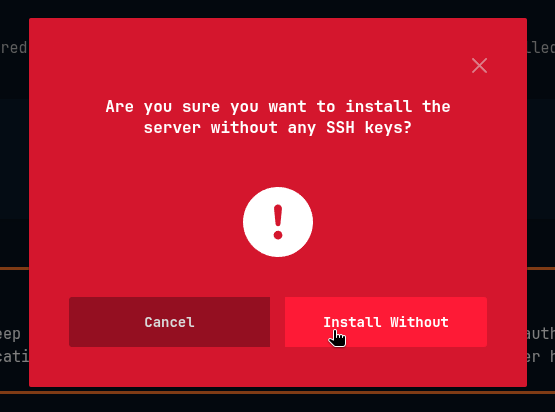
A little lower there is a field where you can add your personal SSH key; we’ll get to this in the next step, and for now you can ignore it. So for now, just click the Install button:

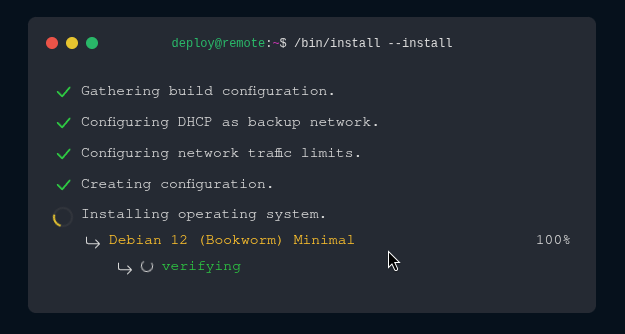
You will then be warned that you have not added any SSH key, but that’s fine, and you can simply click Install without. And now the installation process of your server has finally started, which will be completed within a few minutes:
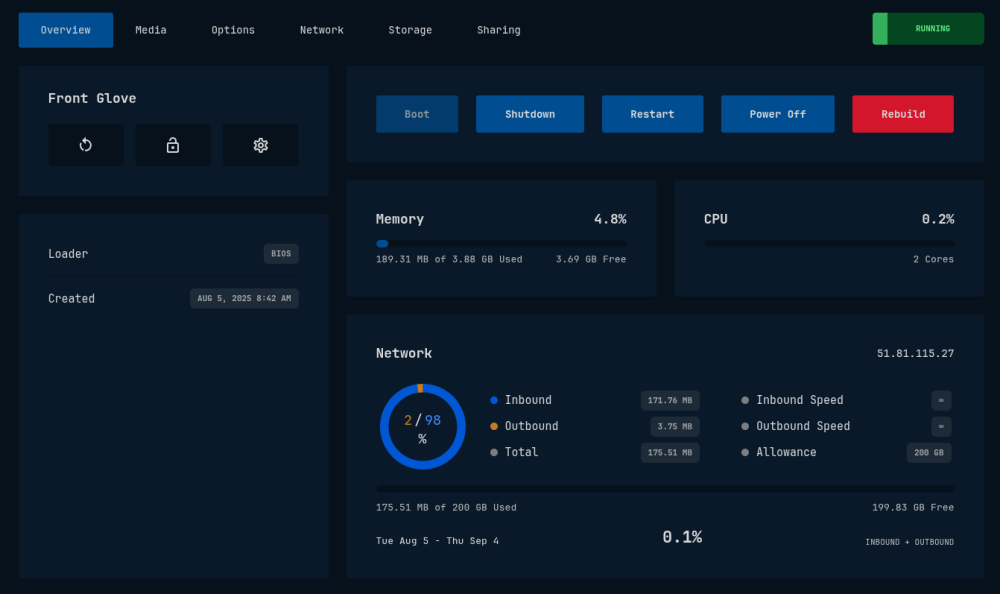
After a successful installation, your control panel will appear before your eyes:
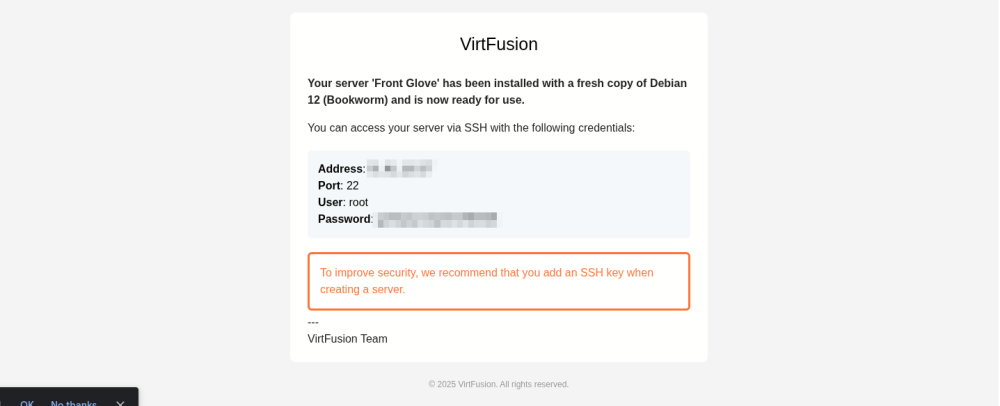
IMPORTANT! You will receive the password for your root user on the installed server by email; it will look approximately like this:
Now comes a very important stage—connecting via SSH.
Log in to the VPS via SSH
To connect to your server, we will need the ssh system utility, which is available on all three types of operating systems (Windows, macOS, Linux-based OSs). To use this utility, you need to open your system terminal. The way to do this differs on each operating system, so it’s best to look into this before moving on.
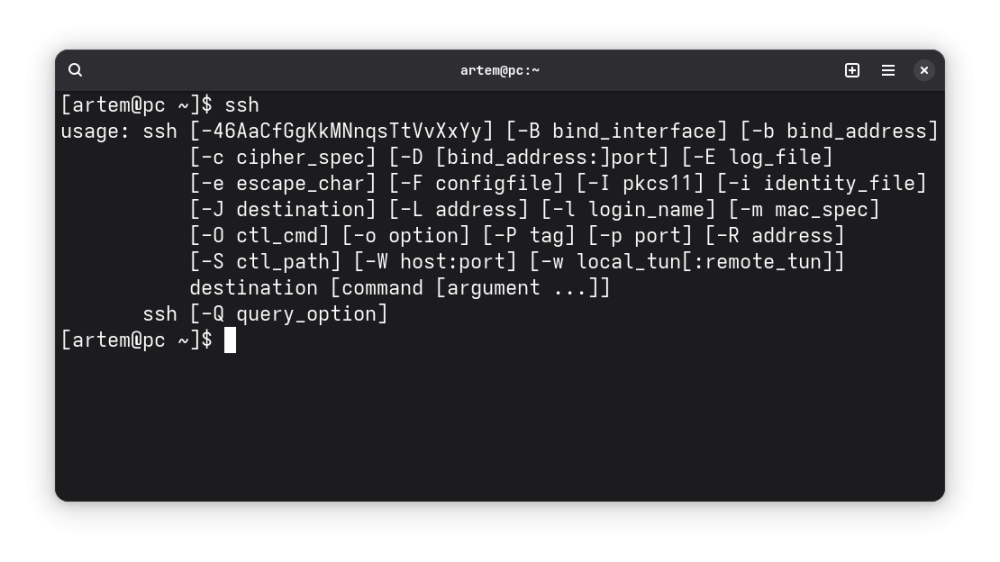
Once you’ve managed to open the terminal, check for the SSH client by simply typing the ssh command in the terminal:
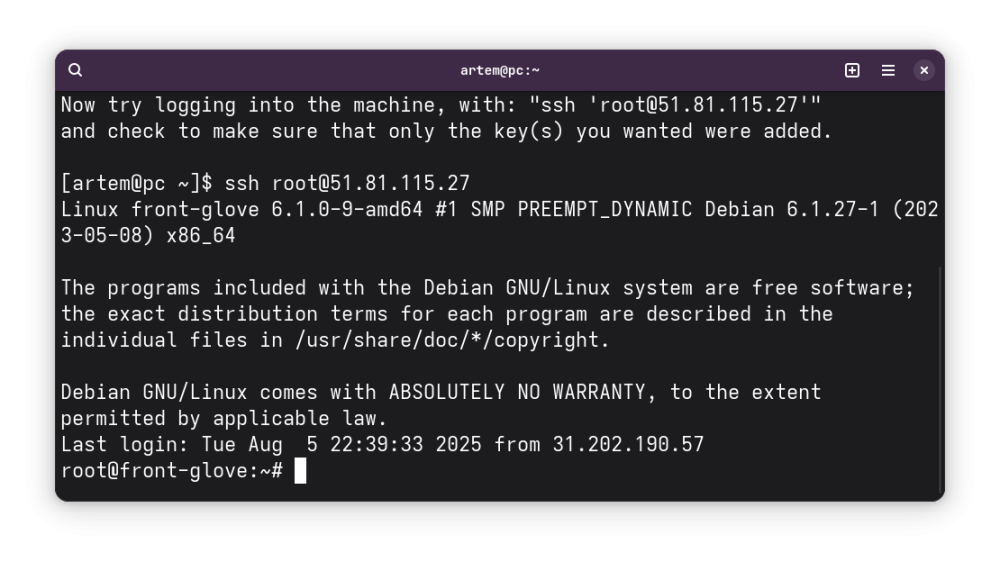
Great, now let’s combine all the information you’ve received. To connect to your server, you currently only need the server’s IP, the user, and their password. In the terminal, you need to type the command: ssh <user>:<ip>, where in the user section you enter the one you received in the email, and in the IP section you enter your server’s address, also from the email. It should look something like this:
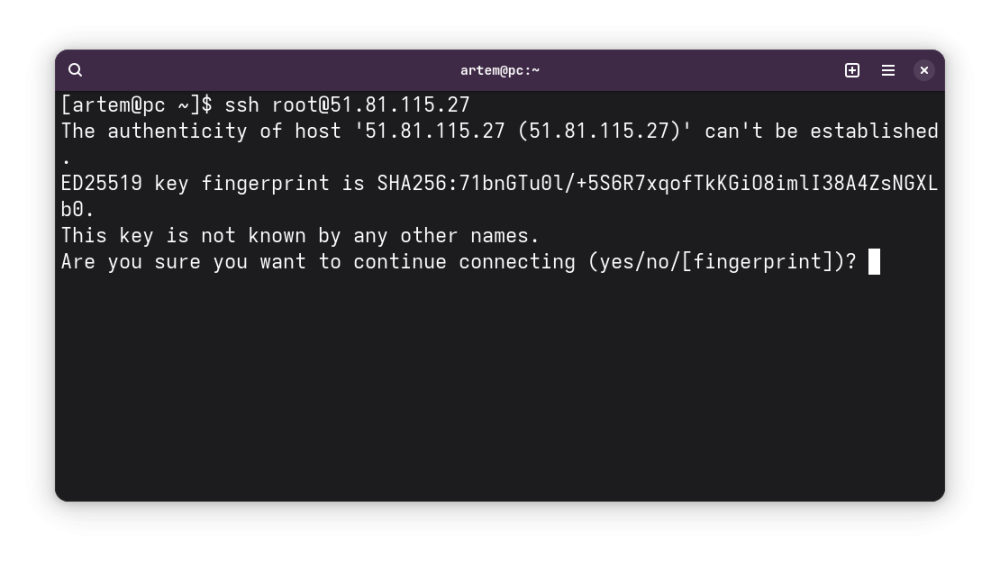
You will be asked whether you trust the server’s key and whether you want to continue connecting. You need to type yes and press Enter. After that, SSH will ask you for your server’s password:
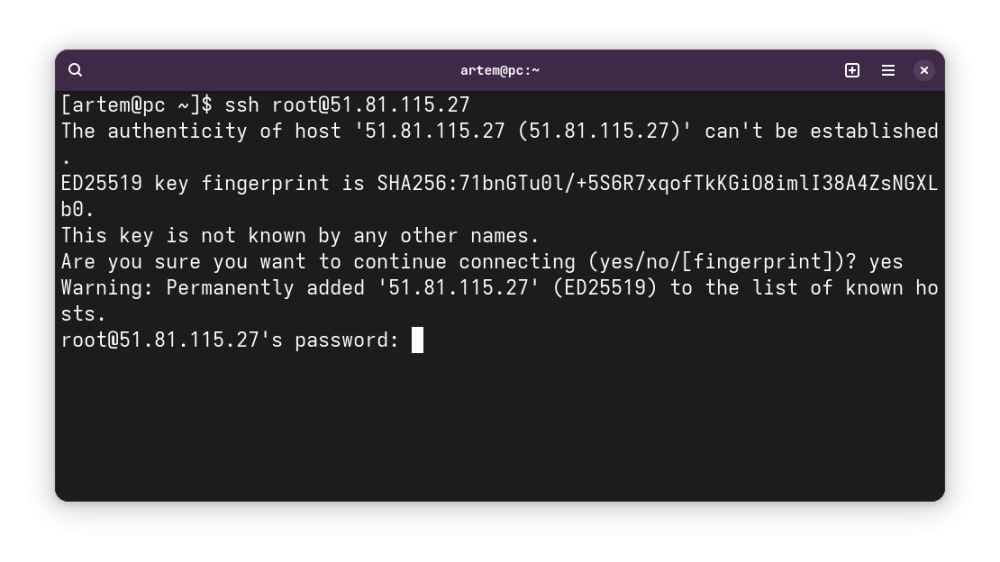
Here you must enter your server’s password. ATTENTION! For security reasons, you will not see what you are typing, so don’t be alarmed—that’s correct!
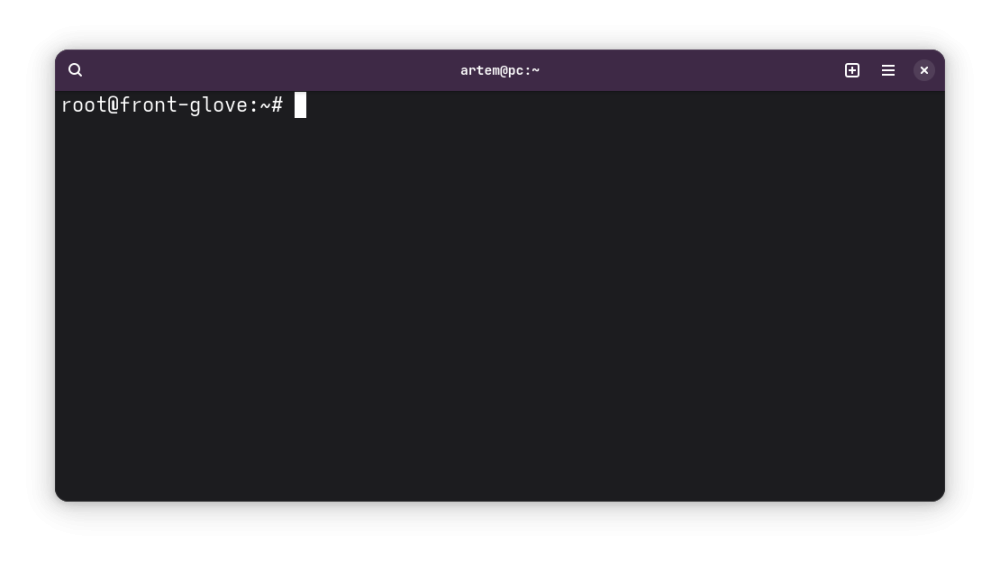
After successfully entering the password and pressing Enter, you should be let into your server:
You can also send your key to the server so that you don’t have to use the password every time. To do this, replace the ssh command with ssh-copy-id:
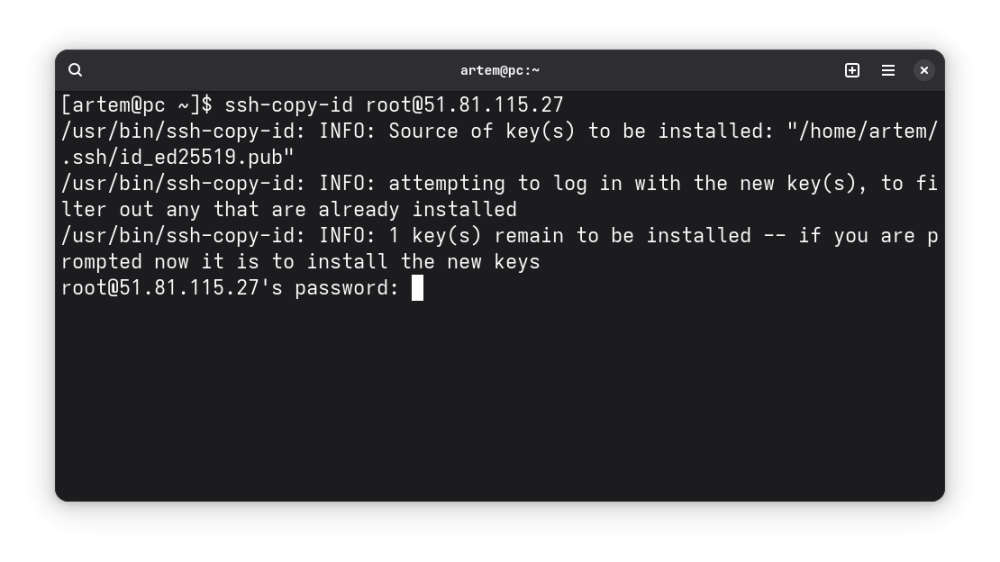
Now you only need to enter the password once, and the key will be copied to the server:
We have now finally set up and successfully connected to your server via SSH!
Basic setup: Where to start?
So, you’ve gained access to your new virtual server. In front of you is a clean operating system ready to work. However, before hosting your future website, game server, or other application on it, you need to perform a number of basic but critically important configurations. The primary steps are aimed at strengthening your server’s security, because as soon as it appears on the network, it immediately becomes a potential target for automated attacks.
The first and most important step is changing the root user’s password. Working under the root account, which has absolute privileges in the system, is extremely risky. Therefore, immediately after your first login to the server, you must set a new, complex password. To do this, simply enter the passwd command. The system will first ask you to enter the current password and then the new one twice. Choose a strong combination of uppercase and lowercase letters, numbers, and special characters to make it impossible to guess.
The next step is to create a new user with administrative rights. Constantly working under the root account is bad practice. It’s much safer to create a separate user for daily tasks, granting them the ability to run commands with superuser privileges via sudo. This helps avoid accidental destructive actions and adds another layer of security. Creating a user is usually done with the command adduser username, after which the system will ask a few questions to configure the profile. Then you need to add this user to the sudo group (or wheel, depending on the distribution), which will allow them to execute commands as an administrator using usermod -aG group user.
After creating a new privileged user, it’s worth completely disabling password login for the root account and, ideally, for all users by switching to SSH key authentication. During connection, the system checks for matching keys, which is a much more reliable method than a password that can be guessed or intercepted. To do this, you need to generate keys on your computer, copy the public key to the server (usually into the ~/.ssh/authorized_keys file), and then in the SSH server configuration file (/etc/ssh/sshd_config) change the parameters PasswordAuthentication to no and PermitRootLogin to no. This will drastically increase protection against brute-force attacks.
Now that access to the server is protected, it’s time to take care of network security. This is where configuring a firewall comes in. A firewall controls incoming and outgoing traffic, allowing only those connections that you explicitly permit. On most modern Linux distributions, a convenient tool for managing the firewall is UFW (Uncomplicated Firewall). Its main advantage is simplicity. First, set the default policy: deny all incoming connections and allow all outgoing ones. This is done with the commands ufw default deny incoming and ufw default allow outgoing. After that, you need to open only the required ports. For a standard website, this is at minimum the port for SSH connections (22 by default) and the ports for web traffic: 80 (HTTP) and 443 (HTTPS). This is done with the commands ufw allow ssh, ufw allow http, and ufw allow https. After configuring the rules, activate the firewall with the command ufw enable.
And finally, you can move on to installing and basic configuration of the web server. The most popular options today are Nginx and Apache. The choice depends on your tasks, but both will do an excellent job of serving a site. The installation process usually comes down to a single command (for example, apt install nginx for Debian/Ubuntu-based systems). After installation, the web server will already be running and will display a default placeholder page if you go to your server’s IP address in a browser. This confirms that the firewall is configured correctly and allows traffic on port 80. Further configuration involves creating a configuration file for your site (a so-called virtual host), where you specify the domain name and the path to your project’s files on the server. For Nginx, you can read about how to write configuration files on their documentation page.
