
 en
en
 CHAT WITH GODLIKE TEAM


This guide explains how to set up a Minecraft server on a VPS using three popular server types: Forge, Fabric, and Paper. Instructions assume you have basic Linux command-line experience and root or sudo access to your VPS.
Prerequisites
- A VPS with at least 2 CPU cores, 4GB RAM, and SSD storage (for modded servers, more resources may be needed).
- A 64-bit Linux distribution (Ubuntu 20.04+ or Debian 11 recommended).
Step 0: Connect to Your VPS from Windows
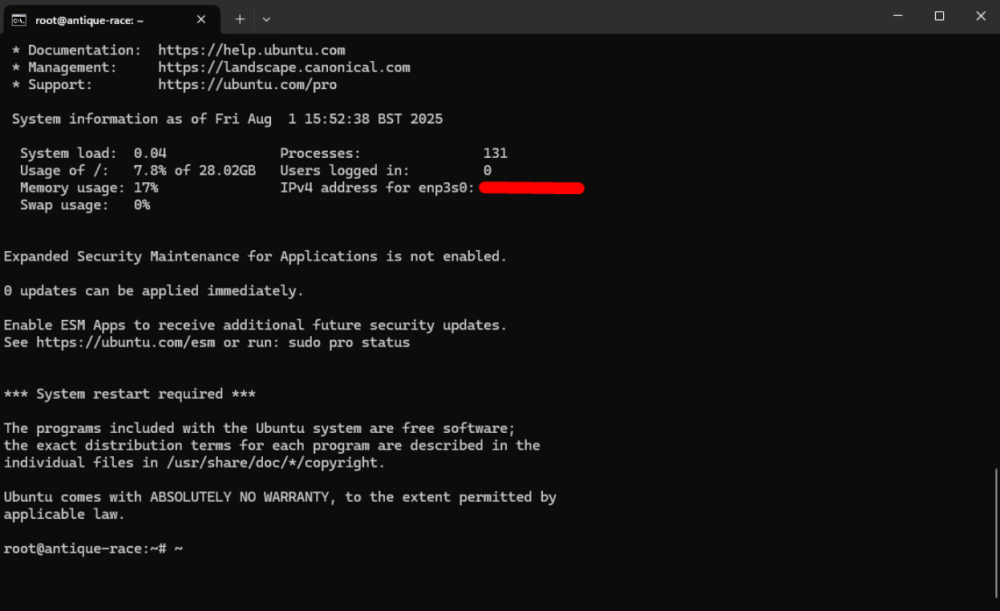
Before installing a Minecraft server, you need to connect to your VPS. If you're using Windows, you have two main options:
Option 1: Using Windows Terminal / PowerShell
- Press
Win + Sand type “Terminal” or “PowerShell”
– Then click Windows Terminal or PowerShell to open it. - Use the following command to connect (replace with your actual address and port):
Connects to the server via SSH
ssh root@YOUR_SERVER_IP -p PORT
ssh root@192.0.2.10 -p 22
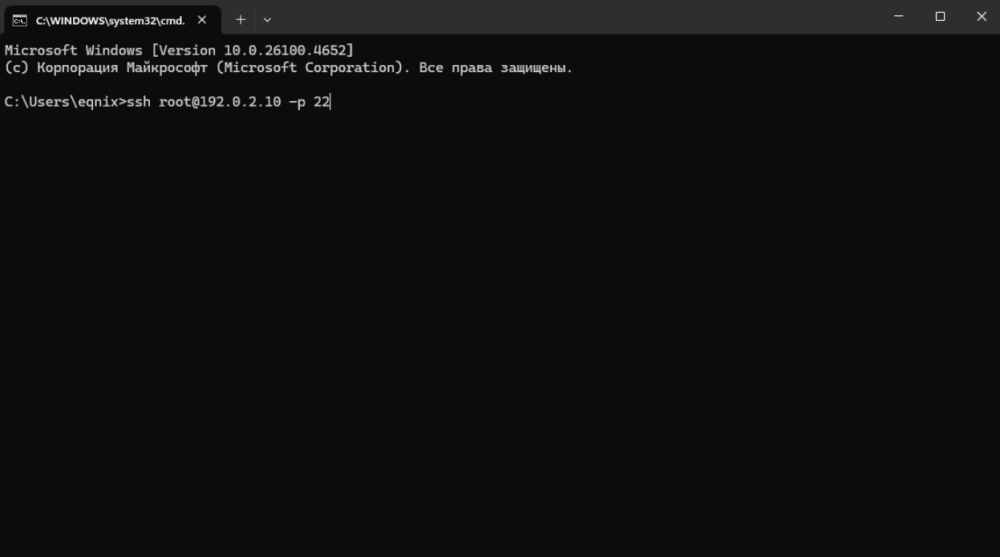
- When prompted, enter the password you received by email.
(See the message from VirtFusion — the password is next to Password:)
Option 2: Using PuTTY (if you prefer a GUI)
- Download PuTTY from: https://www.putty.org/
- Open PuTTY
- In the Host Name (or IP address) field, enter your VPS IP
- Set the Port (default is
22, change if needed)
- Click Open
- When the terminal appears, log in with:
- Username:
root
- Password: (from the VirtFusion email)
Step 1: Install Required Packages
17 Java:
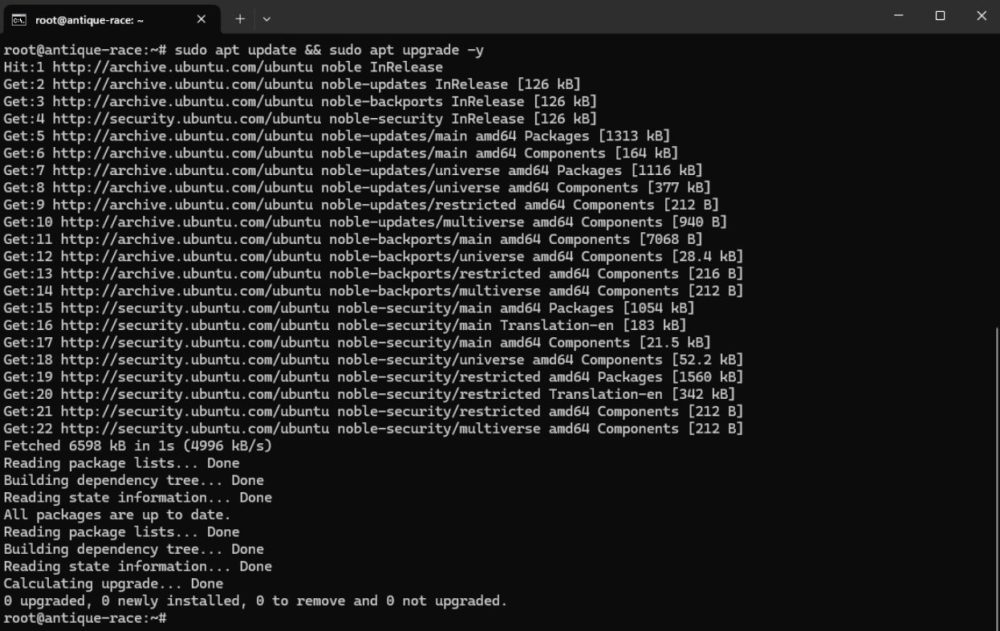
Update package list and upgrade existing packages:
sudo apt update && sudo apt upgrade -y
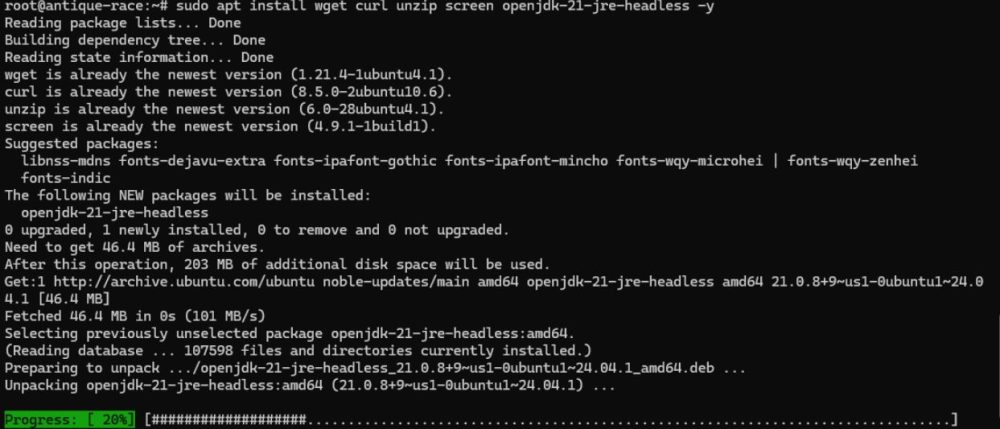
Install Java 17 and required utilities:
sudo apt install wget curl unzip screen openjdk-17-jre-headless -y
or
21 Java:
Install Java 21 and required utilities:
sudo apt install wget curl unzip screen openjdk-21-jre-headless -y
Verify Java installation:
Check installed Java version:
java -version
Step 2: Create a Server Directory
Create main server directory:
mkdir ~/server
Navigate into the server directory:
cd ~/server

Use a separate folder for each server type (e.g., ~/server/forge/, ~/server/fabric/, etc.).
Section 1: Installing Paper Server
1. Download Paper
Visit https://papermc.io/downloads/all?project=paper to find the latest version or use the API:
Create a directory for Paper server:
mkdir paper
Navigate into the Paper directory:
cd paper

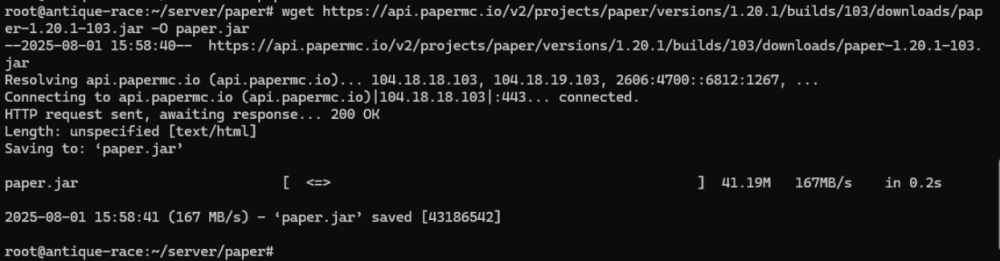
Download Paper server jar:
wget https://api.papermc.io/v2/projects/paper/versions/1.20.1/builds/103/downloads/paper-1.20.1-103.jar -O paper.jar
2. Accept EULA
echo "eula=true" > eula.txt
3. Start the Server
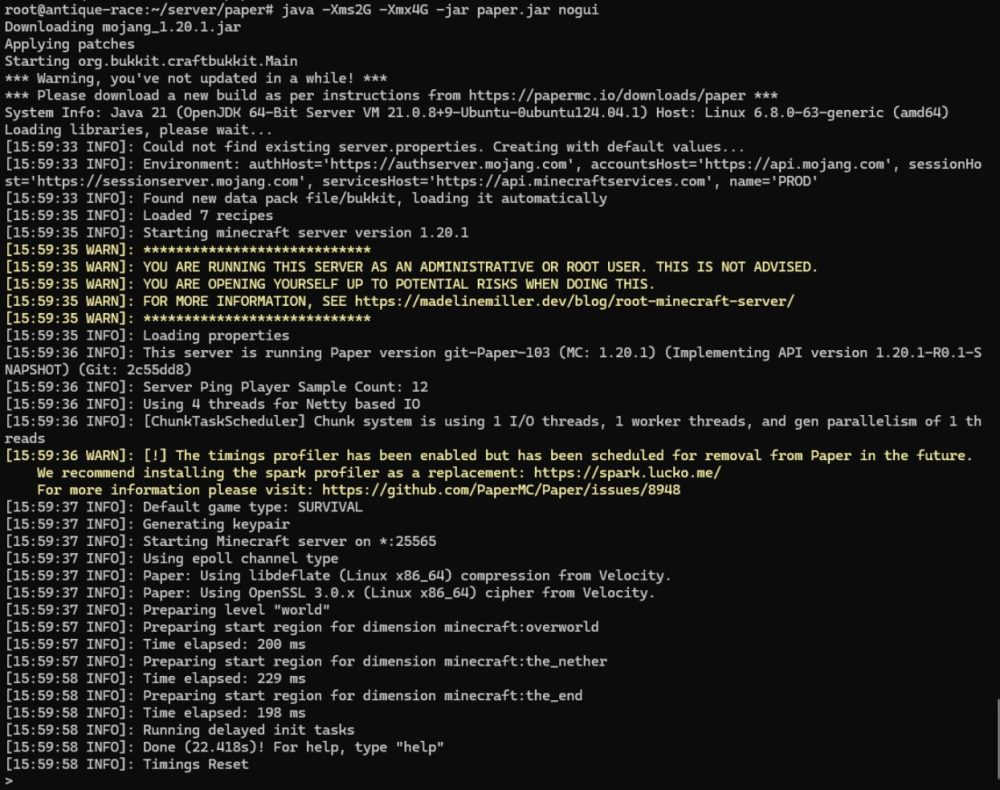
Start Paper server with 2 minimum and 4GB maximum limit of RAM, no GUI:
java -Xms2G -Xmx4G -jar paper.jar nogui

Use screen to run it in background:
screen -S paper
java -Xms2G -Xmx4G -jar paper.jar nogui
To detach: Ctrl+A, then D.
To reattach: screen -r paper.
- Done!
Section 2: Installing Forge Server
1. Download Forge Installer
Visit https://files.minecraftforge.net/ to get the installer for your version. Example:
Create a directory for Forge server:
mkdir forge
Navigate into the Forge directory:
cd forge
Install Forge server files:
wget https://maven.minecraftforge.net/net/minecraftforge/forge/1.20.1-47.2.0/forge-1.20.1-47.2.0-installer.jar
2. Run Installer (Server Mode)
Start Forge server with 2 minimum and 4GB maximum limit of RAM, no GUI:
java -jar forge-1.20.1-47.2.0-installer.jar --installServer
3. Accept EULA
echo "eula=true" > eula.txt
4. Start Server
screen -S forge
java -Xms2G -Xmx4G -jar forge-1.20.1-47.2.0.jar nogui
Section 3: Installing Fabric Server
1. Download Fabric Installer
Go to https://fabricmc.net/use/ and download the server installer:
Create a directory for Fabric server:
mkdir fabric
Navigate into the Fabric directory:
cd fabric
Download Fabric installer jar:
wget https://maven.fabricmc.net/net/fabricmc/fabric-installer/1.0.0/fabric-installer-1.0.0.jar
2. Run Installer (Server Mode)
Install Fabric server for version 1.20.1:
java -jar fabric-installer-1.0.0.jar server -mcversion 1.20.1 -downloadMinecraft
3. Accept EULA
echo "eula=true" > eula.txt
4. Start Server
screen -S fabric
java -Xms2G -Xmx4G -jar fabric-server-launch.jar nogui
Notes
- Replace 1.20.1 with the Minecraft version you are targeting.
- For modded servers (Forge/Fabric), put .jar mods in the mods/ folder.
- For plugins (Paper), place .jar files in the plugins/ folder.
- Always test with minimal mods/plugins first to verify compatibility.
- Monitor resource usage with tools like htop or top.
- To find the wget link, you simply need to copy the download link by right-clicking on the download icon on the site
Conclusion
You can now run a Minecraft server on your VPS using Forge, Fabric, or Paper. Each server type has its own advantages:
- Paper: Fastest and best for plugins.
- Forge: Best for complex mods.
- Fabric: Lightweight, newer modding ecosystem.
Choose based on your intended use case.