en
en
Minecraft Farming Guide: Crops, Animals, XP, and the Best Farms to Build
- 9 min read
- 3409 views
- 0 likes
TL;DR
If you want a reliable Minecraft Server Hosting farm, start with crops: use a hoe to create farmland, place a water source so it hydrates your field, and keep the area lit (light level 9+ at night). Bone meal speeds things up fast, but smart layout and lighting keep farms productive 24/7. Once food is stable, add animal pens, a bamboo farm for fuel, and a simple mob farm for experience. When you’re ready to scale, the best long-term builds are an iron farm, an automatic crop farm, and a dedicated XP farm.
TIP
What farming means in Minecraft
A Minecraft farm is any setup that produces repeatable resources with less work over time. Some farms are hands-on, some run while you’re nearby, and the best ones keep paying you back with minimal input.
Most farms fall into three styles:
- Manual farms: you plant and harvest everything yourself.
- Semi-automatic farms: you still do one action (like replanting), but collection is handled with hoppers and chests.
- Fully automatic farms: the farm runs without you doing anything, usually using redstone, villagers, or mobs.
The best farms in Minecraft are the ones that create an infinite supply of essentials: food, fuel, iron, and experience.
How to start a basic crop farm
You can start farming in almost any biome in the Overworld, and yes, you can even build a working crop farm in The End if you bring what you need.
1) Create farmland
To create farmland, take a hoe and use it on dirt or grass. Those blocks become farmland blocks, which are the foundation for most crops.
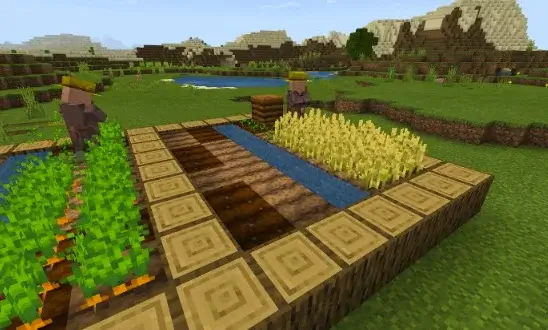
A simple early setup is perfect: a small 9x9 patch, a water source, and a few torches.
2) Water matters (a lot)
Crops can grow on dry farmland, but they grow faster when hydrated. A nearby water source block boosts growth rate and keeps farmland from drying out.
The classic layout is a 9x9 field with a water block in the center. That one source hydrates the farmland around it as long as the tiles are close enough. If you prefer long rows, a trench-style farm works too.
3) Light keeps your farm alive at night
Crops require light level 9 or higher to grow at night or underground. Place torches around the edges, or use glowstone and sea lanterns if you want a cleaner look. Lighting does two jobs: crops keep growing, and hostile mobs are less likely to spawn near your farm.
Seeds and the best beginner crops
To start growing, you need seeds or plantable items:
- Wheat seeds come from breaking tall grass, and you can often find them in villages.
- Carrots and potatoes are common in village chests and farm plots (and they can also drop from zombies).
- Pumpkins and melons are great once you find seeds, since they can turn into long-term trading and food options.
Crops can be harvested by hand when they’re fully grown. Replant right away so your farm stays productive.
TIP
How to make crops grow faster
Bone meal is the obvious speed button. You can use bone meal to instantly grow crops, especially early on when you’re impatient and hungry.
But there are a few less-obvious mechanics that make a farm feel faster even without spam-clicking fertilizer:
Hydration and layout
Hydrated farmland grows crops more efficiently than dry soil. Keep your water close and protect it from being blocked or removed.
Don’t plant one crop type in long solid rows
Here’s a mechanic that catches players: planting the same crop in adjacent rows can slow growth. Mixing crops in alternating rows (wheat, carrots, wheat, potatoes) can help avoid that slowdown and keeps harvests more consistent.
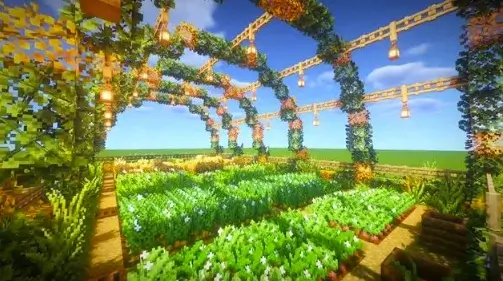
Bees can quietly speed things up
If you want a farm that feels alive, place beehives and a few flowers near your crops. Bees can pollinate and advance growth stages, which helps in bigger builds where waiting becomes annoying.
Protecting your farm
A good farm is protected, not just productive.
- Use fences and a fence gate so animals and mobs don’t trample crops.
- Light the area well so you’re not fighting creepers while you harvest.
- Keep storage close. If items sit on the ground too long, they can despawn. Hoppers feeding into chests is the easiest fix.
If you want to get a little fancy, a simple hopper-based item sorting setup prevents the classic problem where a full chest backs up the system and your drops start disappearing.
Animal farming: easy food, materials, and steady progress

Animal farms are your low-stress resource engine: food, leather, wool, eggs, and more.
Breeding basics
To breed animals, lure at least two of the same type into a pen using their preferred food, then feed them to enter love mode. Keep each species in its own enclosure to avoid chaos and overcrowding.
A few practical animal tips
- Cows give leather and food, and you can milk them by right-clicking with a bucket.
- Chickens passively lay eggs over time. If you place a hopper under them, you can collect eggs automatically and build a simple chicken farm without much effort.
- In Java Edition, some designs use entity cramming in a 1x1 space to deal with too many cows automatically, but build those carefully and keep them away from your main base noise.
TIP
Villagers: farming, trading, and experience
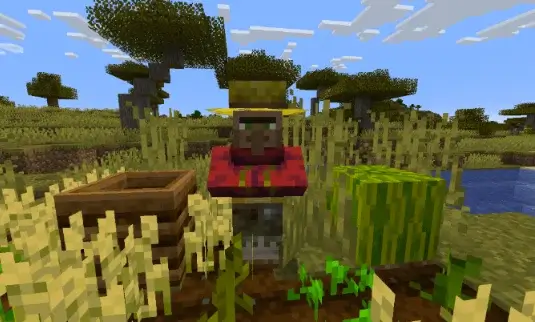
Villagers turn a basic crop farm into a profit machine.
A farmer villager uses a farm’s composter as a job site. Once you’re trading, crops become more than food. They become emeralds, gear, and sometimes extra experience.
Trading can also be part of your XP strategy. It’s not as flashy as a mob farm, but it’s steady, safe, and it stacks nicely with other farms.
XP farms, mob farms, and why difficulty matters
If you’re building for enchanting and repairing gear, experience farming is essential.
- Many common XP farms require a difficulty above Peaceful, because they rely on mobs spawning.
- A simple early mob farm works anywhere you can force darkness and manage spawn spaces.
- If you’re manually killing mobs for drops, a sword with Looting III helps maximize item drops.
Later on, the big XP names are the Enderman XP farm and Nether farms like gold and XP builds. They’re powerful, but they’re also version-sensitive, so always match your design to your game version.
Bamboo farm + furnace XP: the quiet power combo
If you like systems that run in the background, pair a bamboo farm with smelting.
- Bamboo is an easy renewable fuel source once you set it up.
- A furnace can store experience from smelting over time. When you pull the finished items out, you collect the XP.
For heavy smelting, fuel choices matter. Lava buckets are extremely fuel-efficient, and a good fuel plan can keep a furnace line running for a long time. If you’re smelting nonstop, build storage first so you don’t lose output when chests fill up.
Automation basics: making farms feel effortless
Once you’re past the starter farm stage, automation becomes the real upgrade:
- Use redstone tools like observers and pistons to harvest automatically.
- Use hoppers to collect items, then route them into chests.
- Multi-tier farms can use water streams to wash mature crops into a collection channel.
One thing people forget: many farms only work if their chunks are ticked. If you build your farms too far away from where you spend time, they will feel broken when they’re really just unloaded. Proximity to your base matters.
The best farms to build next
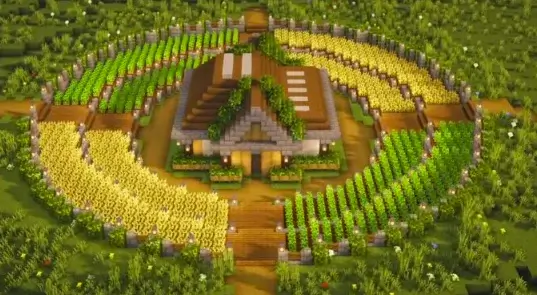
If you want a simple roadmap, this order works well in almost any minecraft world:
- Automatic crop farms for stable food and trading
- Mob farms for early experience and loot
- Bamboo farm for renewable fuel
- Iron farm for hoppers, tools, rails, and basically everything
An iron farm is one of the most important grown-up builds because iron touches nearly every other system. It’s the kind of farm that makes all your other farms easier.
FAQ
Do crops grow without water?
Yes, but slower. Hydrated farmland speeds up growth and prevents drying.
What light level do crops need?
Light level 9+ for growth at night or underground.
Why is my farmland turning back into dirt?
It usually dried out, got trampled, or was left unplanted too long.
What’s the easiest farm for beginners?
A small wheat-and-potato plot with a water block, torches, and a nearby chest.
What’s the most useful late game farm?
Iron farm, because it supports storage, automation, rails, and redstone builds.

Read Next
-
Best Minecraft Server Hosting 2026 – 12 Compared & Ranked Providers
Important Note: Godlike.host is our own service. This ranking is editorial (not paid placement) and follows the scoring criteria shown below. Always verify current plan limits, pricing, and regions on each provider’s website before purchasing….
-
Minecraft 1.21+ Seeds Worth Trying (Cherry Villages, Dungeons, and Beauty)
TL;DR If you want one seed that feels like a complete starter world, pick Cherry Valley Trio (Seed: 608548899648438462) for villages, deep structures, and a strong exploration route.If you want a dramatic build location with…
-
What Y Level is Best for Diamonds in Minecraft (1.20 -1.21)
Ultimate Minecraft Diamonds Mining Guide Why are diamonds so wanted by many? Minecraft Diamonds – shiny blue gems in the world of Minecraft that also happen to be the ore required to have the best…