To move a singleplayer modded world to a server, install the exact same modpack, mod loader and Minecraft version on the server, find the world folder in your launcher's saves directory, zip it, upload and extract it in the server's root folder, set level-name in server.properties to the folder's name, and restart the server. Modded blocks survive only if the server runs the same mods.

Make your own FREE minecraft server
MINECRAFT FREE SERVER
What you need before moving a modded world
Before moving a modded world, prepare five things: the exact modpack and Minecraft versions, a server with that modpack installed, a backup of the world, file manager or SFTP access, and a fully closed game. If you miss even one, your world might end up broken.
- You need the exact same versions of the modpack and Minecraft. Go to your instance settings in the CurseForge app, Modrinth App, or Prism Launcher. Write down the modpack version, the mod loader (like NeoForge, Forge, or Fabric), and the Minecraft version.
- You'll also need a server that already has that same modpack installed, or at least its server pack.
- Back up your singleplayer world and copy to an alternate location outside of the save folder.
- Next, you will require a method to handle files on the server, either through the file manager or SFTP access.
- Last, double check that your game is entirely shut down. Copying files while your game is still running might result in partial writes, and the copy will be corrupt.
Where can I view my saved modded world?
You'll find that in the saves folder, inside the specific folder for your game instance. Launchers for modpacks usually create a separate folder for each instance, so it's not always in the default .minecraft location. If you only check the default path, you might not find anything.
| Launcher |
OS |
Path to saves |
| Vanilla Launcher |
Windows |
%appdata%\.minecraft\saves |
| Vanilla Launcher |
macOS |
~/Library/Application Support/minecraft/saves |
| Vanilla Launcher |
Linux |
~/.minecraft/saves |
| CurseForge app |
Windows |
C:\Users\<name>\curseforge\minecraft\Instances\<modpack name>\saves |
| Modrinth App |
Windows |
%appdata%\ModrinthApp\profiles\<profile name>\saves |
| Prism Launcher |
Windows |
%appdata%\PrismLauncher\instances\<instance name>\minecraft\saves |
| ATLauncher |
Windows |
<ATLauncher folder>\instances\<pack name>\saves |
If you changed the install folder in the launcher settings, your saves won't be at these paths, so open the folder from the launcher instead.
Open the folder from the launcher
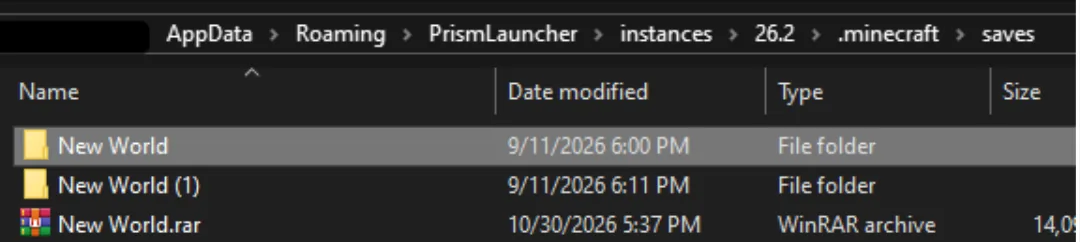
You should click on the instance you need, then choose “Open Folder” in CurseForge or Prism Launcher. Alternatively, the Modrinth App will be showing a folder icon on the profile page. This will redirect you to the instance directory. There, view one subfolder per world.
Step 1: Install the same modpack on the server
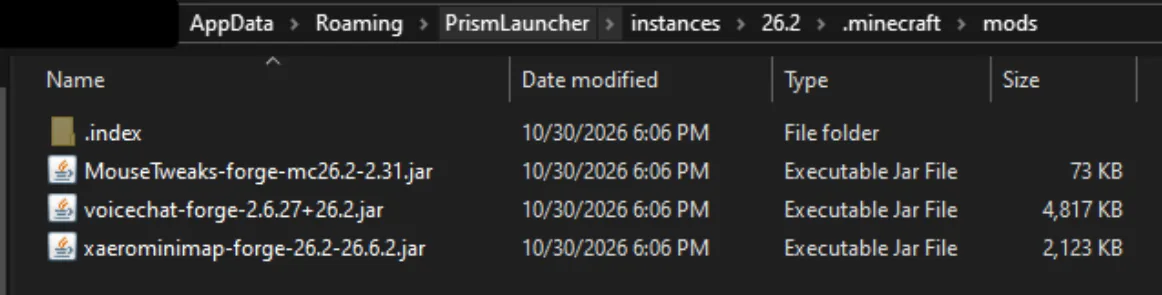
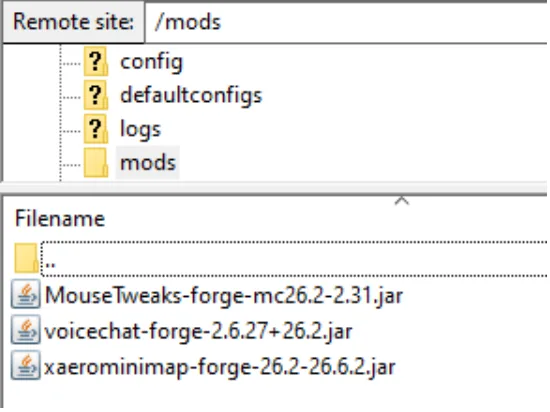
To transfer a modpack world to a server, install the exact same modpack version, mod loader and Minecraft version on the server as in your singleplayer instance, because blocks from mods missing on the server turn into air. Check in advance that these have the same Minecraft version. In case there is no mod for a certain server, the blocks of this mod will disappear. Once a save goes through, you won’t have a chance to get these blocks back.
We recommend comparing the reports of your server with the numbers that you wrote down earlier. On Godlike, you can install a modpack with one click of the mouse. Alternatively, download the modpack’s server pack manually from the author’s page and go step-by-step through the installation script.
You should start the server once and then stop it. In this way, you’ll produce several key files you’ll need shortly.
Step 2: Back up and prepare the world folder
You shouldn’t move the world folder anywhere – instead, just copy it. If it happens so that something goes wrong during the upload, the original in saves will be your only backup.
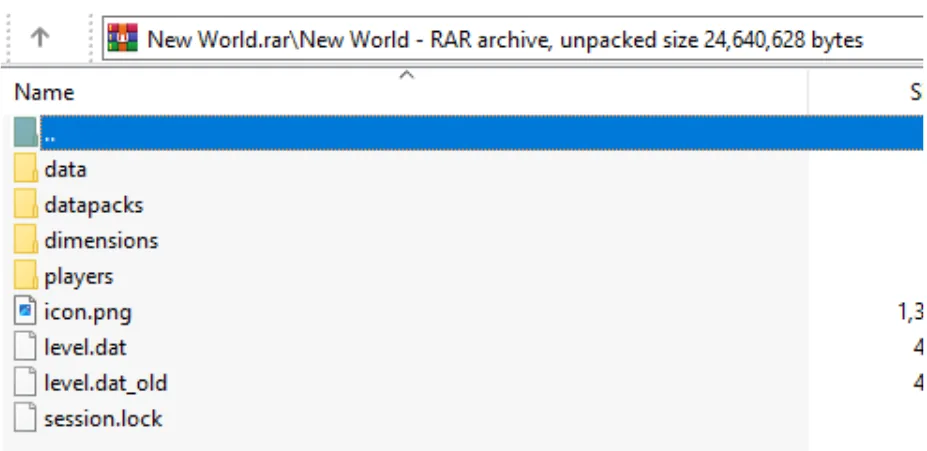
Create a ZIP file of the copy. Open the archive and inspect the contents. It should contain files like: level.dat, the region/ folder, playerdata/ and, for any dimensions you've visited, DIM-1 (Nether), DIM1 (End) and a dimensions/ folder if modded dimensions use one. On Minecraft 26.1 and newer, the world uses a different layout: region data sits in dimensions/minecraft/overworld/, the Nether in dimensions/minecraft/the_nether/, the End in dimensions/minecraft/the_end/, and player files in players/data/. Change the name of the folder, then, and do not use spaces in the name: e.g., “my_modded_world”.
Step 3: Upload the world to the server
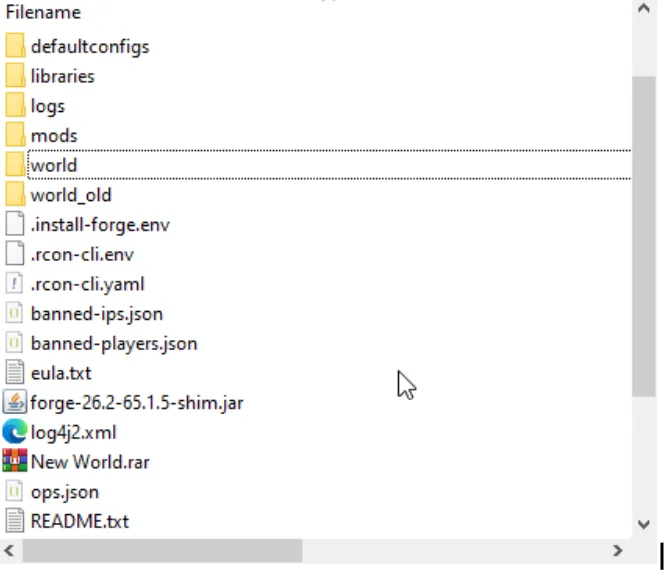
To upload a modded world to a server, drop the archive into the server's root folder, the one with server.properties. A small world will upload nicely via the file manager in the panel but with large files you'll need SFTP. Packs that run for a long time such as All the Mods 10 or Better MC tend to generate worlds that exceed 1 to several gigabytes which can cause browser timeouts when uploading.
Extract the archive on the server: in the Godlike Panel, open Files, click the three dots next to the archive and choose Unarchive. You want your world folder sitting flat in the root, with level.dat at my_modded_world/level.dat.
Like other players doing that, you will likely find a leftover, which is the default world folder from that first run you had. It's better to rename it to "world_old" or to remove it altogether. The server loads only the folder named in level-name, so world_old stays untouched as a fallback. Always keep a backup of the server’s old world.
Step 4: Set level-name in server.properties
In server.properties, set level-name= to the exact folder name. Case matters. For example: level-name=my_modded_world. You can also leave server.properties as it is and rename your world folder to world, the default level-name value.
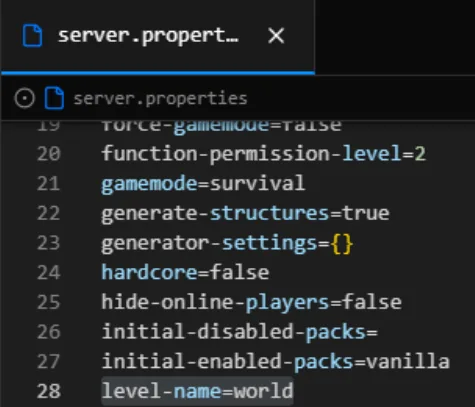
Save, and hold off on toggling anything else for now. Settings like view distance, max-players, etc. are fine to change once the world loads with minimal lag.
Step 5: Copy mod data that lives outside the world folder
Some mods save their state outside the world folder, so the world itself might not be the whole save. Go through each location below and consider the move done.
- serverconfig/ (in the world folder): per-world settings for Forge and NeoForge mods. It travels with the world automatically.
- config/ (on the server). This is where the mod configuration is read from. Copy the changed config files from your instance if you used custom values in singleplayer.
- defaultconfigs/ (server root): Forge and NeoForge copy these files to serverconfig/ only when a new world is created, so your existing world will keep its settings in serverconfig/.
- datapacks/ (inside world folder): Datapacks that change worldgen or recipes. Without them, structures and recipes are different.
- kubejs/ (server root.) If you edited in singleplayer copy kubejs/ from your instance folder.
- FTB Quests and Chunks. You can also transfer chunk claims and/or quest progress over to the new world. Quest progress and chunk claims are stored in the ftbquests/ and ftbchunks/ folders in the world folder respectively so they will be preserved when the world is moved. The quest book itself comes from config/ftbquests/quests/ in the modpack.
- Map data. The data from the JourneyMap and Xaero's map will stay on your computer in the instance folder. You don't have to upload anything to the server.
- Mods. Every mod that adds blocks, items, entities, or dimensions must be on the server. It's better not to use client-only mods, such as minimaps or shaders.
Step 6: Start the server and check the world
Run the server and watch console during start up. In a correct load, the console line Preparing level "my_modded_world" shows your folder name. If a new world folder appears in the server root instead, level-name doesn't match your folder name.
Warnings about missing registry entries or unknown blocks are worth noting because they're also signs of a mod mismatch. If any of these appeared shut down the server immediately and return the world from your zip, fix the list of mods and try again.
Always join using your modpack instance, never vanilla. Then explore for a little. Walk around your base, open some chests, even look at a chunk in each of your modded dimensions.
Why is my inventory missing after moving the world?
Your inventory is missing after moving the world to a server because singleplayer saves it in level.dat, while the server reads playerdata/<UUID>.dat and creates an empty player for you.
In Minecraft 26.1+ your inventory is saved to world/players/data/<uuid>.dat and level.dat refers to it. Inventory is transferred along with the world if you join from the same account.
It's better to check your UUID before renaming anything
What UUID you require is dependent on whether the server is online-mode=true or not. If online-mode=true the server will use your real Mojang account UUID. If online-mode=false the server will generate an offline UUID based on your username.
To find it, join the server once, stop it, and look up your name in usercache.json in the server root: the uuid next to it is the one the server uses.
Open level.dat first. You should be able to copy the Player compound and save it as a .dat file named for your UUID inside playerdata/. You should also create a backup file and never do all this on the original.
Symptoms after upload, causes, and fixes
| Symptom after upload |
Cause |
Fix |
| A fresh world generates instead of yours |
level-name doesn't match the folder name, or the zip was extracted one level too deep |
Correct level-name= to the exact name, and check that level.dat sits directly inside the folder |
| Modded items became air |
Mods missing from the server, or present in other versions |
Shut the server down, put your backup back, install the identical mod list, then restart |
| Empty inventory after the move |
Your items were stored in level.dat, but the server reads playerdata/<UUID>.dat |
Copy the Player data into a file named for your UUID |
| World was saved in a newer version |
The server runs an older Minecraft version than the one that last saved the world |
Install the matching or a newer Minecraft version, since downgrading a world isn't supported |
| Modded dimensions empty or reset |
DIM-1, DIM1 or dimensions/ didn't upload |
Re-extract the archive and confirm those folders exist |
| Crash on server startup |
Mod loader or mod versions that don't fit the world |
Check latest.log, line the versions up and retry |
| Quest progress or chunk claims lost |
The ftbquests/ or ftbchunks/ folder inside the world didn't upload |
Re-upload the whole world folder, including ftbquests/ and ftbchunks/ |
Almost all of it boils down to two culprits: mismatched versions and a wrong name.
Moving an existing modded server to Godlike.Host
If you're moving an existing server and not a singleplayer world, it's a little simpler:
- Stop the old server and download the entire server folder (not just the world folder). This includes mods/, config/, defaultconfigs/, kubejs/ (if used by the modpack), the world folder, and server.properties.
- Install the same modpack version on Godlike.Host, then upload these folders to overwrite the fresh installation.
- Use the same Java version as before: Java 16 for Minecraft 1.17, Java 17 for 1.18–1.20.4, Java 21 for 1.20.5–1.21.x, and Java 25 for 26.1 or newer.
- Start the server and verify that the console loads your existing world rather than generating a new one.







 en | USD

 CHAT WITH GODLIKE TEAM