Changing Minecraft skins is easy, but it varies depending on the device you use. A player can experiment with their character’s look via the Minecraft Launcher or official profile options if they play Java Edition. Meanwhile, Bedrock features a special Dressing Room that offers extensive customization options.

Make your own FREE minecraft server
MINECRAFT FREE SERVER
In our Minecraft skin guide, we will cover all the ways to change your character's appearance across all major platforms, such as PC, mobile, and consoles (Xbox, PlayStation, and Nintendo Switch). Also, we’ll help you upload custom skins, taking into account the specifics of each edition and gaming platform.
Java Edition Skin Change
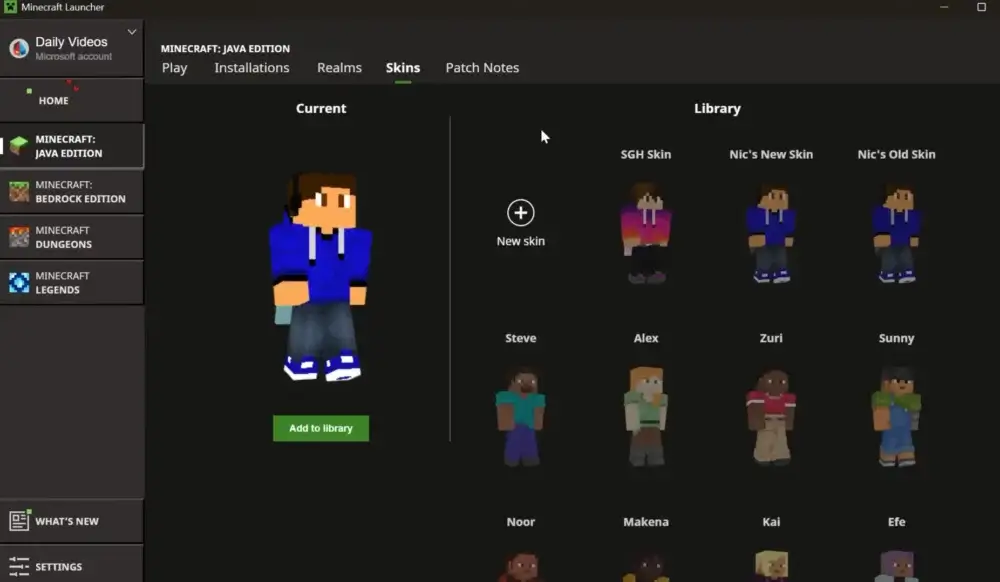
Most new players wonder how to change a skin in Minecraft Java once they enter multiplayer servers and see other players with amazing custom skins. You can do it easily via the Minecraft Launcher by taking some simple steps:
- Get the right skin file: Use community platforms like NameMC and The Skindex to find a skin you like and download it. Ensure that the file is in .png format.
- Upload your skin: Open the official Minecraft Launcher and click the Skins tab at the top of the window. Add a new skin by uploading the downloaded .png file. Also, type a name, choose a model type (Slim or Classic (Wide)), and optionally select a cape.
- Using other launchers: If you use a third-party launcher, you can use your skins when you log in with your Microsoft account.
Consider that changing your skin sometimes takes time. Thus, don’t panic if you enter the game and see that nothing has changed immediately.
But how to change Minecraft skin if you don’t have an official game version? In this case, it’s better to visit your launcher’s official website and look for detailed instructions from its developers since they may differ from app to app.
Bedrock Edition Skin Change
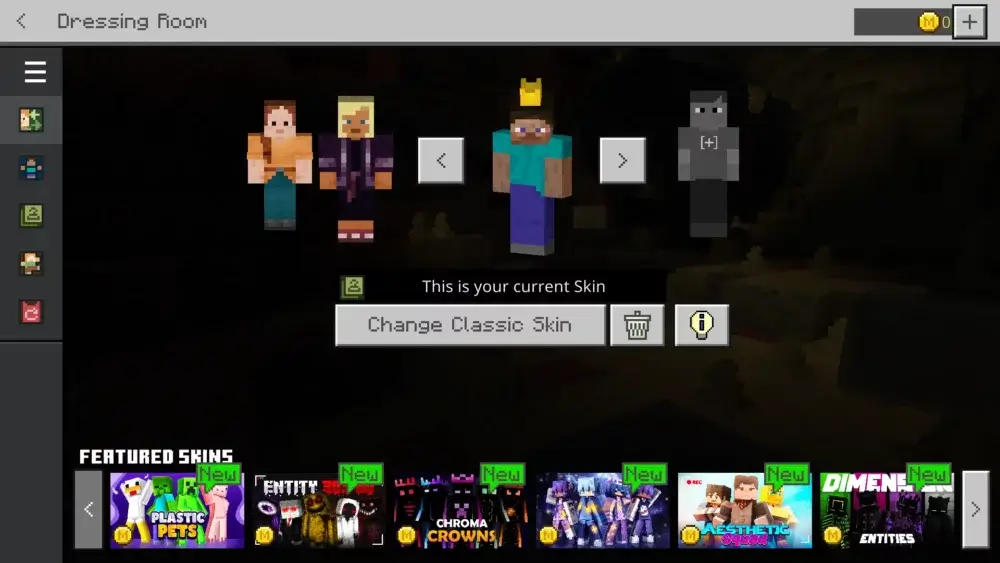
Overall, changing your skin in Minecraft Bedrock Edition offers more built-in customization options than in Minecraft Java. Here, you can open the Dressing Room, where you can create several characters. So, how to change skin in Minecraft Bedrock Edition:
- Enter the Dressing Room: Open Minecraft Bedrock Edition and click the Dressing Room button. You can find it in the main menu under your character.
- Create your skin: You can choose an existing character or pick an empty slot to create a new one.
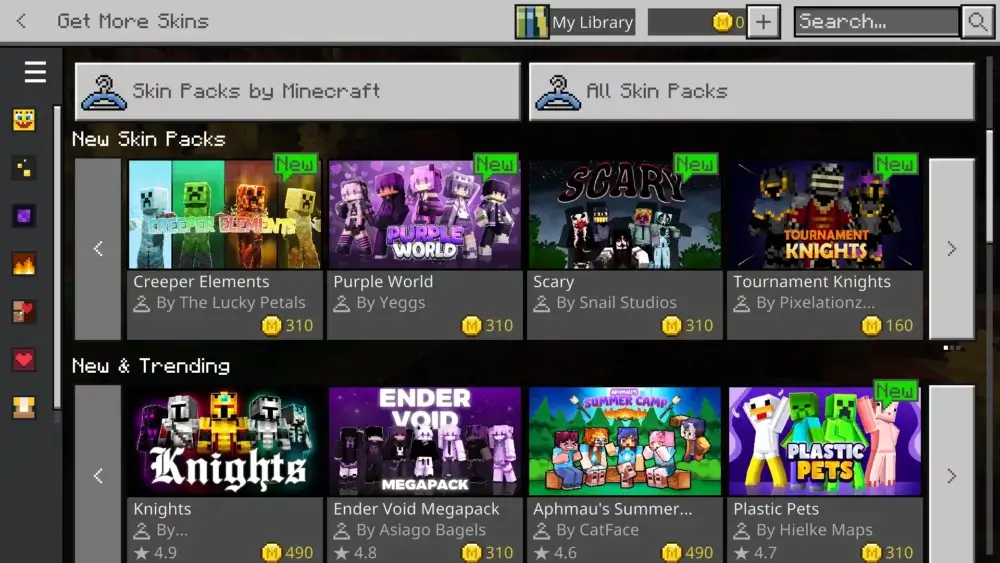
- Customize your skin: Bedrock Edition allows you to customize your character using Character Creator items or to buy extra looks and new characters from Minecraft Marketplace.
- Finish customizing your character: Once you’re done, click Equip.
If you play on PC, Chromebook, or mobile, you can also import skins by clicking Choose New Skin in the Classic Skins tab. Select the downloaded .png file, choose between the Slim and Classic (Wide) model types, and confirm your choice.
Mobile Skin Change
You can easily import or change your Minecraft skin on your mobile device by following the basic instructions for Minecraft Bedrock Edition. Nevertheless, you may still face some specific issues:
- File Import Fails: Newer versions of Android and iOS may prevent Minecraft from accessing your gallery or downloads directly, making it impossible to import a skin. Thus, ensure that you’ve provided the game with all the necessary permissions before you tap Choose New Skin.
- File Format Issue: Minecraft may refuse to import images that aren’t 64x64 pixels.
Console Skin Change
If you want to know how to change Minecraft skin on console, the easiest way is to use the official Marketplace and Dressing Room. Due to console platform restrictions, uploading Minecraft skins is blocked on PlayStation, Xbox, or Nintendo Switch.
Also, custom skins imported on your mobile device or PC version don’t automatically sync to your Microsoft account. Thus, you will still be unable to use your skins from third-party websites. Nonetheless, consider that the official Character Creator and pre-purchased skin packs still offer players an excellent opportunity to unleash their imagination.
Custom Minecraft Skins
Have you looked through numerous sites and the Minecraft marketplace, but you still can’t find something that meets your preferences? Well, you can create your own Minecraft custom skin and upload it directly in the game using one of the methods described above.
First, you need to find a platform that lets you create custom looks. There are many websites available, but if you don’t know which one to choose, you can opt for the advanced Minecraft Skin Editor from Godlike:
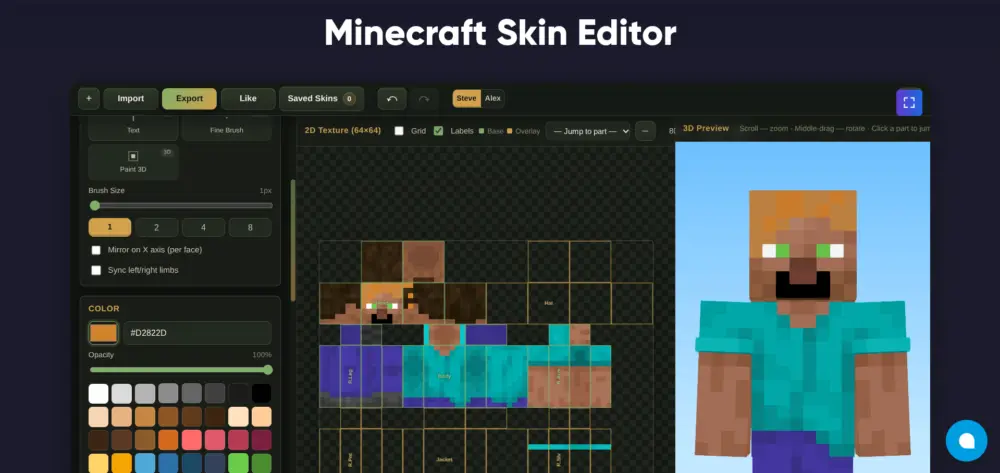
Using this platform, you can create your own look from scratch. Also, you can upload a Minecraft skin and customize it however you want.
Once you are done, it’s time to save your skin. First, you need to choose between two types of skins:
- Classic (Wide): This model features a 4-pixel-wide arm. It was the original skin used for Steve.
- Slim: This model gives a character a skinnier look by featuring 3-pixel-wide arms. It was introduced alongside Alex.
Also, check the Minecraft skin file format to verify it’s .png with dimensions of 64×64 pixels. If you use high-resolution (HD) skins, you should check whether they require specific mods to render properly.
Finally, even if you know how to upload a custom Minecraft skin and properly adjust it for the game, you should still be careful when using third-party platforms. It’s better to opt for a trusted and reputable website to ensure you won’t download malware together with your custom Minecraft skin.
Where to Find Minecraft Skins Safely
Now, let’s find out how to use custom skins safely. There are three simple rules to follow when you create and download a file with your custom skin for Minecraft:
- Never enter your Microsoft login and password on third-party platforms for skin creation.
- Avoid downloading suspicious files.
- Ensure that the downloaded file is a .png image, not an executable or installer.
And if you don’t know which site to select, you may opt for Godlike, Nova Skin, or Tynker.
Why Your Minecraft Skin Is Not Changing
So, you’ve created the best look for your character and just finished the Minecraft skin upload. However, when you enter the game, nothing has changed. Don’t panic! There may be the following issues:
| Issue |
Solution |
| Minecraft skin hasn’t changed |
1. Re-upload your skin using one of the methods described in our guide.
2. Completely close Minecraft and its launcher, log out of your Microsoft account, and sign back in. This refreshes your authentication session.
3. If you use a third-party launcher, check its documentation regarding using custom skins. |
| Minecraft Bedrock Edition can’t import a skin |
1. Ensure that Minecraft has proper permission to read the .png file from your gallery or the Downloads folder.
2. Check whether “Only allow trusted skins” is turned off in your profile settings.
3. Restart the game. |
| Minecraft can’t find a skin to import |
1. Verify that you’ve downloaded a .png file with the correct resolution. |
Java vs Bedrock Skin Differences
It’s time to finally understand the differences between changing skins in Java and Bedrock Editions. The comparison table below highlights the key things to consider between these two Minecraft versions:
| Java Edition |
Bedrock Edition |
- Easier upload of custom skins.
- No built-in features for skin customization.
|
- Built-in Dressing Room and Character Creator that act like a Minecraft skin editor.
- Ability to purchase skins from the Marketplace.
- Specific limits for console players.
|






 en | USD
 CHAT WITH GODLIKE TEAM