TL;DR / How to make a Pixelmon server (short answer)
To make a Pixelmon server, install Java 21 and the NeoForge server for Minecraft 1.21.1. Put the official Pixelmon server jar in the mods folder, accept the EULA, and make sure every player runs the same Pixelmon build.

Make your own FREE minecraft server
MINECRAFT FREE SERVER
- Ensure that Java 21 is installed on your PC.
- Install the appropriate version of NeoForge using the official NeoForge installer into a dedicated server folder.
- Download the official Pixelmon Reforged server JAR file and place it into the mods folder.
- Accept the Minecraft EULA in the eula.txt file by setting eula=true. Launch the server using run.bat or run.sh.
- Make sure that every player has installed the same mod build on their own client to join the Pixelmon multiplayer server.
If you prefer not to set up the environment manually, you can use a pre-configured, one-click modpack available on the Godlike Host Pixelmon Modpack page.
The current versions for the mod build, mod loader, and runtime environment were verified on November 2, 2026. Check out the compatibility table below to see their specifics.
What You Need Before You Start
To start a Pixelmon server, you need Minecraft 1.21.1, the NeoForge build, and Java 21. Every player must run the same Pixelmon and NeoForge versions as the ones installed on the server. The server and every player must match on Minecraft, NeoForge, and Pixelmon versions. Both sides need Java 21.
| Component |
Recommended |
Source
(verified as of Nov 2, 2026) |
| Minecraft |
Minecraft 1.21.1 |
Official Pixelmon Downloads |
| Mod Loader |
NeoForge 21.1.248 |
Official Pixelmon Downloads |
| Pixelmon |
9.4.2 |
Official Pixelmon Downloads / Pixelmon on Modrinth |
| Java |
Java 21 |
Pixelmon Server Installation Wiki |
Why don't the old Forge guides work anymore? Starting with version 9.3.0, the project switched to NeoForge completely. As a result, the classic Forge is not suitable for the current Pixelmon 1.21.1. Read more about the differences between loaders in our Fabric vs Forge vs NeoForge comparison guide.
RAM requirements:
- Official Pixelmon sources: The official server installation guide specifies at least 4 GB, preferably more. The Pixelmon server performance guide calls 6 GB the bare minimum for most servers. It also does not recommend allocating more than 16 GB due to Java garbage collection pauses.
- Godlike Host recommendations: 6 GB is indicated as the optimal default start on the Godlike Host Pixelmon Modpack hosting page. The FAQ section mentions a range of 4–6 GB for a small group of friends. 8 GB+ of RAM is recommended for larger numbers of players, active exploration of the world, building a hub, or hosting tournaments.
To calculate memory for other tasks, check our Minecraft RAM calculator guide and our article on how much RAM you need for a Minecraft server.
Option 1: Self-Host a Pixelmon Server on Your PC
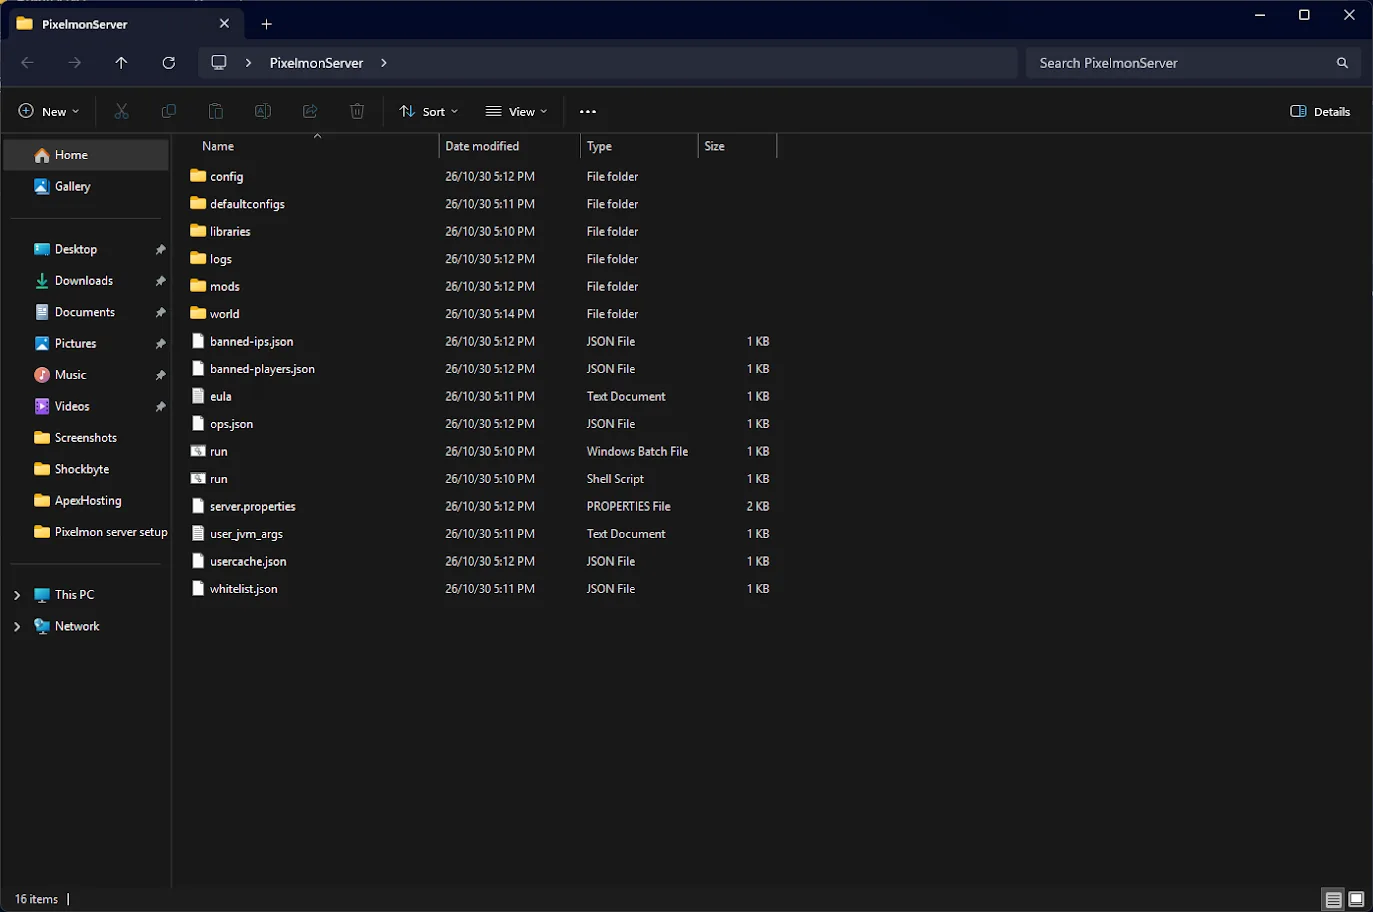
To make a Pixelmon server for free, run it on your own PC. Install the NeoForge server, add the Pixelmon server jar, and start it with run.bat or run.sh. Follow the Pixelmon server installation instructions:
- Install the server core. Download the NeoForge installer from the NeoForge website for your mod version. For example, choose version 21.1.248 for the Recommended 9.4.1 release. Run the installer and select the Install Server option. Specify an empty folder on your drive.
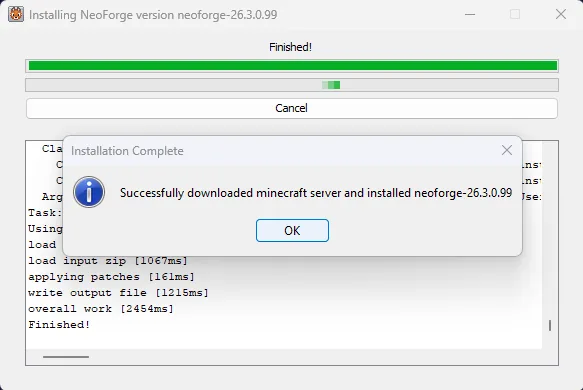
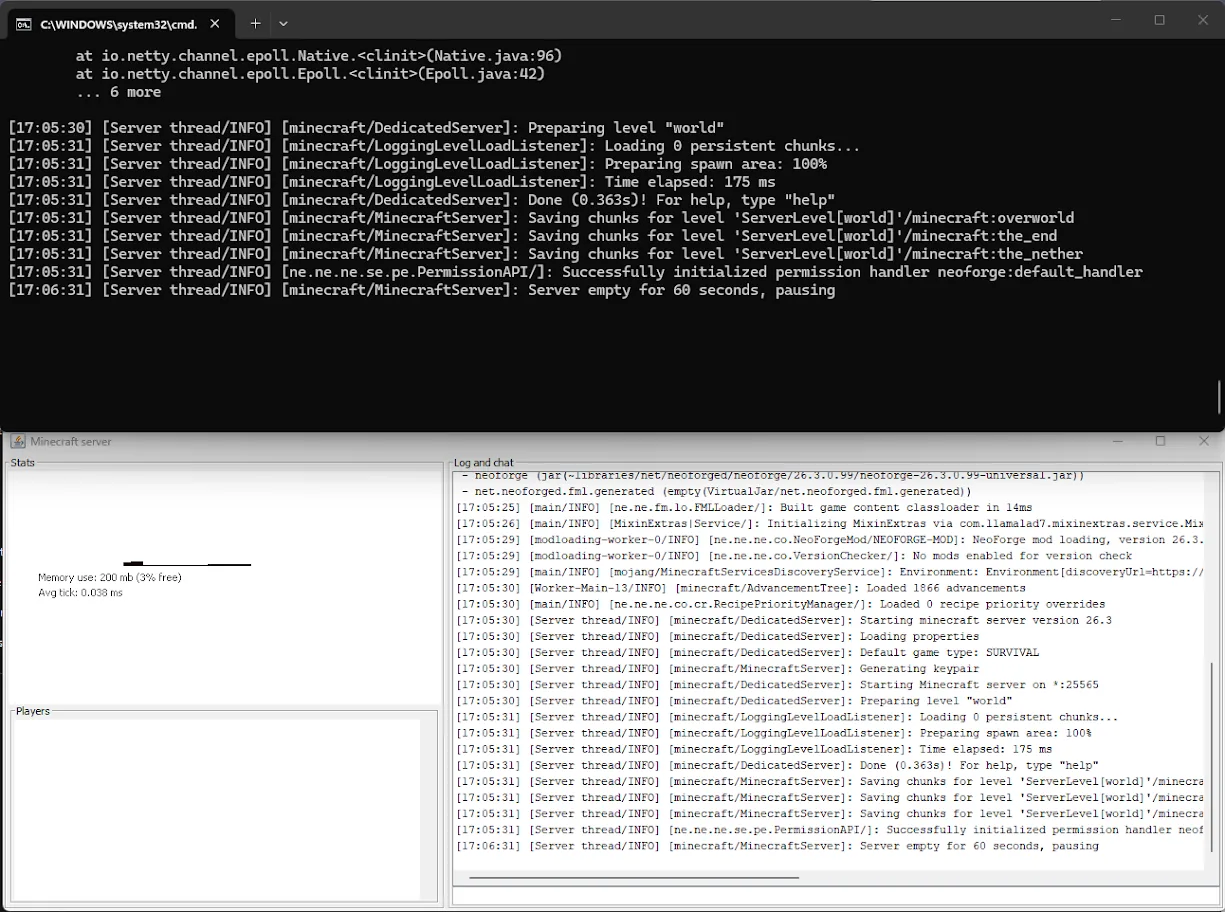
- Perform the initial launch and accept the EULA. Run the generated script run.bat on Windows or run.sh on Linux/macOS. The server will stop and create an eula.txt file. Open this file in a text editor. Change the value to eula=true to accept the Minecraft EULA.
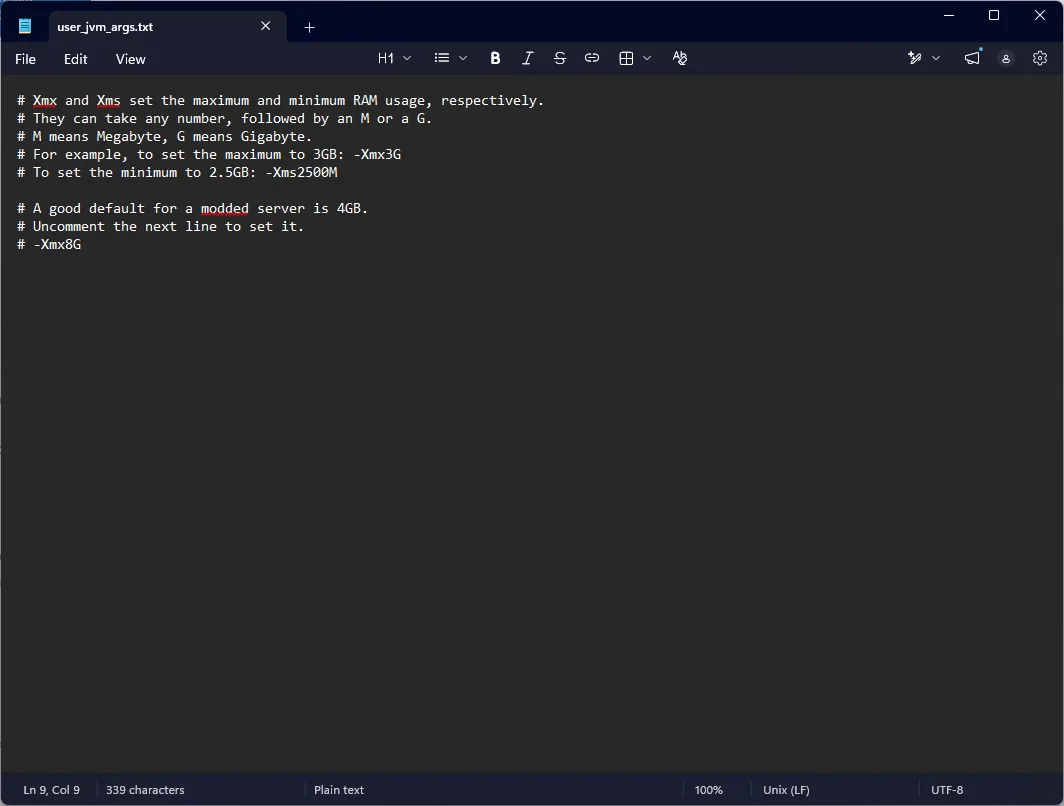
- Set the memory allocation. Open the user_jvm_args.txt file and remove the # symbol to uncomment the line containing the -Xmx argument. Enter the desired amount of allocated memory. For example, it should be -Xmx6G to allocate 6 GB of RAM.
- Add the mod. Complete your Pixelmon server download from the Pixelmon downloads page. Choose the file with the -server suffix. Unlike the -universal version, this is a lightweight server JAR. It excludes client-specific assets like textures and sounds. Move this file into the mods folder. Don't modify the contents of the archive.
- Regenerate the world and start the server. Delete the world folder if you launched the server and allowed the map to generate before installing the mod. In this case, the mod’s structures and biomes will be generated correctly around the spawn point. Run the run.bat / run.sh script again.
The limitations of local hosting. By default, a free Pixelmon server is only visible within your local area network (LAN). If you want to invite friends over the internet, set up port forwarding on your router. You can find instructions in the Minecraft Wiki server setup tutorial. Share your external IP address with other players. Keep your PC turned on the entire time someone is playing.
Option 2: Host a Pixelmon Server with One Click
Use a one-click Pixelmon modpack on a hosting provider if you need a Pixelmon server that stays online 24/7. In this case, you don't need to configure a home router. It installs the matching Minecraft, NeoForge, and Java versions.
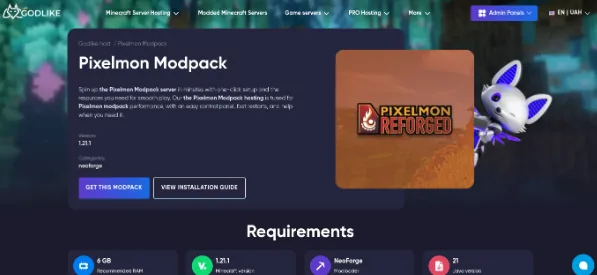
The Pixelmon Modpack hosting page offers a pre-configured one-click modpack for Minecraft 1.21.1. It is built on NeoForge and Java 21, with a recommended allocation of 6 GB of RAM.
- To get started, visit the modpack page. Click Get this modpack and complete the server deployment. The build will be deployed automatically. Also, it will have pre-configured JVM and memory profiles.
- Alternatively, you can install it via the control panel. If you already have an active server with Godlike Host, navigate to the Modpacks tab in your control panel. Search for Pixelmon, select the desired version, confirm the installation, and restart your server. A detailed, step-by-step guide is available in our article on how to install a modpack on a Minecraft server. If you prefer to upload a custom server pack or standalone files manually, follow our guides on how to install a custom modpack on a Minecraft server and connect to your server via SFTP.
Once the modpack has been automatically installed, do not manually change the server core in the control panel settings. This could disrupt the NeoForge library dependencies.
How Players Join
To join a Pixelmon server, players need the same Pixelmon and NeoForge build as the server. It can be installed through a supported launcher or manually. Any discrepancy in versions will trigger a Mod Rejection error when attempting to connect.
- If the server is running via a modpack. The Pixelmon Modpack page states that every participant must install the same version of the Pixelmon modpack. Use officially supported launchers, such as CurseForge, Modrinth, or ATLauncher.
- If the server uses a standalone mod. Players will need to know how to install Pixelmon either manually or via a launcher by following the official Pixelmon client installation guide.
- How to add an IP address in the Multiplayer menu. Our step-by-step guide on how to connect to a Minecraft server describes the basic steps you should follow.
Send your friends a message that specifies the key demands:
Subject: How to play Pixelmon with friends.
Body: To join our server and play together, please follow this checklist:
- Game Version: Minecraft 1.21.1 (Java 21).
- Mod Loader: [your NeoForge version] (copy it from the table above)
- Mod / Modpack: Download [your Pixelmon version] (copy it from the table above) available at the official Pixelmon downloads page, or install our modpack of the same version via your launcher.
- Server IP Address: [Your_IP:Port]
Before opening your Pixelmon Reforged server to players, set PokéLoot spawn-mode and pre-generate the area around spawn. Lower view-distance, because some settings only affect newly generated chunks.
- Configure PokéLoot before playing. YML configuration files are created in the config/pixelmon/ directory when the server is first launched. This is the main Pixelmon config area. Look through the Pixelmon Configs documentation for the full parameter reference. Check the spawn-mode setting for PokéLoot chests immediately. The default mode is FCFS (First Come, First Served). Under this mode, only the first player to find a chest can claim the loot. Change spawn-mode in pokeloot.yml to PL or TIMED. Many generation parameters apply only to new chunks. That is why they must be adjusted before players spread out across the map.
- Review the key files in config/pixelmon/. In addition to loot settings, administrators should verify battle.yml, wild.yml / legendary.yml, storage.yml.
- Perform a world pre-generation. Generating new chunks on the fly creates CPU spikes. The Pixelmon server performance guide recommends pre-loading a map’s radius around the spawn point. For NeoForge 1.21.1, use the Chunky mod on Modrinth to pre-generate chunks around spawn.
- Reduce the view distance. Lower the view distance parameter in your server.properties to prevent the spawning of numerous entities from causing drops in TPS. For example, setting it to a value of 6–8 is a good option for the start. Instructions are available in our tutorial on configuring Minecraft server.properties.
Sidemods, Permissions and Plugins
To create a Pixelmon server with additional features, use Pixelmon sidemods and NeoForge mods placed in the mods folder instead of Spigot plugins.
- Installing sidemods. Official sidemods come as standard .jar files. You should place them into your server's mods folder, following the instructions in our guide on how to install mods on a Minecraft server. Requirements should be taken from the page for the specific sidemod.
- Third-party mods and conflicts. Add new mods one by one. Before doing so, check the official Pixelmon incompatibilities list.
- Configuring permissions. You need to manage player access to commands without granting them operator (op) status. For this, install LuckPerms for NeoForge on Modrinth, which has a native build for NeoForge 1.21.1.
- Do not rely on Spigot plugins. Hybrid server cores will not work here. The server installation wiki states that ArcLight is incompatible with Pixelmon versions 9.2.4 and later. Read our article on Minecraft server mods vs plugins for more information on the differences between mods and plugins.
Pixelmon Server Rules You Must Follow
Your server must follow the Minecraft EULA and the official Pixelmon terms of use whether you make it public or private. You need to state that you are not affiliated with Mojang or the Pixelmon team. Send players only to official downloads, and do not modify the mod or sell its cosmetics.
- Independence Notice. Clearly indicate on the server resources that the project is not affiliated with Mojang Studios. Confirm that it is not associated with the official Pixelmon development team.
- Prohibition on third-party distribution. Direct players only to the official download page or authorized launchers to download Pixelmon, such as CurseForge, Modrinth, or ATLauncher. Distributing the .jar file through your personal resources, such as archives, websites, or Discord channels, is prohibited.
- Integrity of code and cosmetics. The rules prohibit modifying the mod’s compiled code and blocking or selling the built-in Pixelmon cosmetics.
Updating Pixelmon Safely
To update Pixelmon safely, back up the server and stop it. Replace the old Pixelmon jar in mods with the new one. Start it and ask every player to update to the same version. Follow these steps to update your server according to the Updating Pixelmon guide:
- Create a full backup. Always back up your world and configuration files before any update. Use our guide on how to back up a Minecraft server.
- Replace files manually for custom or local installations. Stop the server and delete the old .jar file from the mods folder. Check the compatibility table in the “What You Need Before You Start” section. See if the required version of NeoForge has changed. Place the new Pixelmon jar in the mods folder.
- Updating via a modpack host. If you are using a pre-configured modpack on Godlike Server Hosting, you can reinstall the updated version via the Modpacks tab as shown in our modpack installation and update guide.
- Synchronize client installations. Remind all players to update the mod or modpack on their own computers to the same version as the server.
Troubleshooting Common Pixelmon Server Issues
If you've figured out how to make a Pixelmon server but it fails to start or players can't join, the cause is usually a version mismatch, the wrong Java version, or a blocked connection. Find your symptom below:
Symptom: A player sees a Mod Rejection error when trying to join the server.
- Cause: The version of Pixelmon Reforged or NeoForge on the player's client does not match the version used on the server.
- Solution: Verify the build number in your mods folder. Make sure the player has downloaded the identical version from the official website. Check if they have updated the Pixelmon modpack within their launcher (see How Players Join).
Symptom: The server crashes upon startup. A crash log appears in the console before the world loads.
- Cause: A compatibility requirement mentioned in section 2 has not been met. For example, an older version of Forge might be installed instead of NeoForge, or the system may be using a Java version other than 21. Note that Forge is no longer supported for versions 9.3.0 and later.
- Solution: Check your active Java environment by running the command java -version in your terminal, according to the NeoForge documentation. Reinstall the server using the official NeoForge installer. Also, you can download Java 21 from Adoptium.
Symptom: A “Fatally missing registry entries” error occurs during connection or startup.
- Cause: As noted on the official Pixelmon server installation wiki, this error occurs when the host or client operating system is set to the Turkish locale.
- Solution: Change the system language to English.
Symptom: Friends cannot connect and see the Connection refused / Can't reach server error.
- Cause: By default, a server running on a home PC is accessible only within the LAN. Another reason is a firewall that blocks the connection.
- Solution: If the problem is a local server, configure port forwarding with the help of the Minecraft Wiki server tutorial. If the error occurs on a hosted server, start diagnostics. Follow the steps provided in our guide on fixing the Minecraft connection refused error.
Symptom: Lag and a drop in TPS as players move through the world.
- Cause: The processor is overloaded by the generation of new chunks containing mod-added structures and the spawning of numerous Pokémon.
- Solution: Pre-generate the world with the Chunky mod. Reduce the view distance setting in the server.properties file (see First Hour). If this doesn't help, raise RAM to 6–8 GB, but stay under 16 GB.







 en | USD

 CHAT WITH GODLIKE TEAM