Litematica is a popular schematic and blueprint mod for Minecraft. Players use it to create 3D holographic “blueprints” of buildings to copy, share, or rebuild them in other worlds with ease. This mod is widely used by both average gamers and pro builders who create entire realms with large-scale buildings.

Make your own FREE minecraft server
MINECRAFT FREE SERVER
In our guide, you’ll discover how to use Litematica in Minecraft to level up your building experience. We’ll also go through the download process, review the mod’s UI, and cover common issues.
What Is Litematica in Minecraft?
Litematica is a Minecraft schematic mod that allows you to save a structure from any world as a blueprint and display it as a hologram in your world. It’s primarily used for building in both Creative and Survival modes. The hologram of a structure shows you where to place blocks and highlights missing or wrongly placed blocks. Thus, you can precisely recreate any building.
The mod also features a Material List HUD. It helps players collect all the necessary materials for the build.
Once you’ve built everything, you can use this Minecraft schematic mod to verify your building. Litematica’s Schematic Verifier will scan the structure and identify any mistakes you might have made. This is extremely useful when you work with complex redstone schematics, where even the tiniest mistake may break everything.
Finally, Litematica offers Creative-mode-only features that significantly simplify working on large-scale projects. Using tools like Fill, Replace, Delete, and Paste, you can create different structures in minutes, saving precious time and allowing you to focus more on the details of your buildings.
Why Do You Need Litematica?
The Litematica Minecraft mod is a powerful tool for both casual players who enjoy Survival mode and fans of ambitious projects. Using it, you can:
- Accurately transfer buildings from your Creative worlds into Survival worlds
- Use blueprints to build structures from other players’ worlds
- Ensure you have all the necessary resources by checking the Material List
- Create your own schematic files
- Swiftly create and edit simple structures like circles, domes, towers, and arenas
- Work on large-scale projects in Survival mode without losing direction on what resources you need to collect and where to place them.
What Are Schematics?
Minecraft schematics for the Litematica mod are 3D blueprints that allow players to project holograms of different structures into their Minecraft worlds. They act as a visual building guide, showing where to place blocks, helping you avoid mistakes, and tracking required materials. At the same time, you can use schematics to save your own buildings, so you can recreate them in your other worlds or share them with friends.
How to Install Litematica
Before we dive deeper into our tutorial, let’s discover how to install Litematica in Minecraft. We’ve prepared step-by-step instructions with detailed guidelines to help you with the entire download:
- First, let’s find out how to download Litematica. To avoid using malware that mimics this mod, visit its official page on Modrinth. Open the “Versions” tab and select the version that matches your Minecraft version
- Litematica requires the MaLiLib mod, which you can also download on Modrinth.
- Download Fabric from its official page if you haven’t installed it yet.
- The final file you'll need is Fabric API, which you can find on CurseForge.
All in all, you have to download 4 files. Once you’re done, you are ready to go to the second part of our Litematica tutorial and start the installation process:
- Start by installing the Fabric file, following its guidelines.
- Drag the Litematica, MaLiLib, and Fabric API mods into the “mods” folder in your Minecraft directory. If you don’t see this folder, simply create it there.
- Open Minecraft through Fabric, which you’ll see in your launcher, and ensure that everything works properly.
Litematica Ultimate Guide
Now, let’s get to the fun part of our Litematica guide and discover what you can do with this mod and where to put Litematica schematics. Note that some tips may differ depending on the version of the mod you’ve installed.
Litematica UI and Keybinds
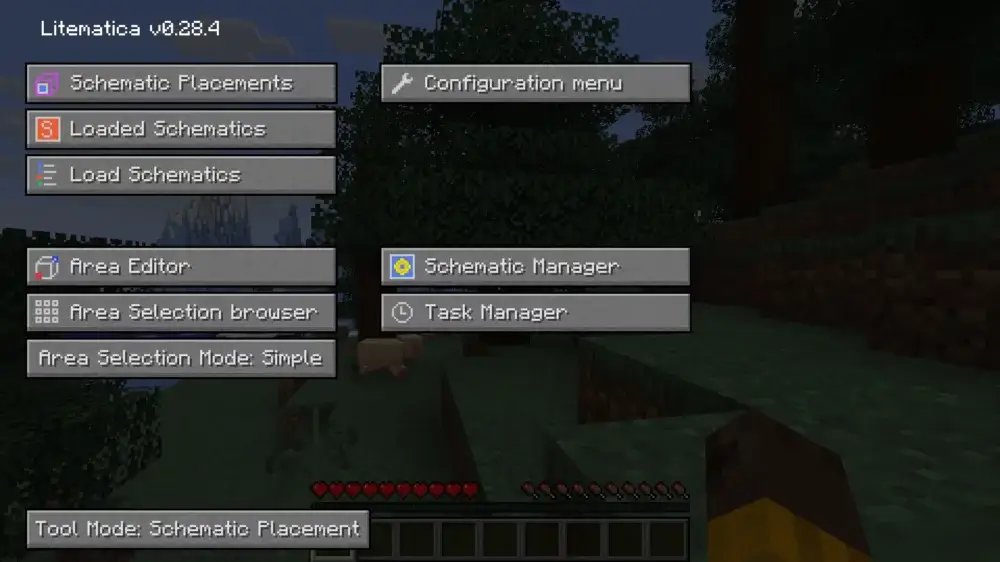
The reason why you’ve installed MaLiLib is that this library powers Litematica's custom keybind system. You can configure the mod’s controls separately from vanilla Minecraft. However, default keybinds are still very comfortable to use, so we don’t recommend changing them if you are a beginner Minecraft player. Simply use the table below to discover how to open Litematica menu and get acquainted with other important key combinations:
| Default Keybind |
Bind action |
| M |
Opens the main Litematica menu |
| M + C |
Directly opens the Configuration menu |
| M + G |
Toggles the rendering of loaded schematics on/off. |
| M + L |
Opens the Material List |
| M + R |
Toggles general Schematic Rendering |
| M + P |
Opens the Schematic Placements menu |
| M + V |
Opens the Schematic Verifier |
The mod also allows you to change any of its default keybinds in the Configuration menu. Navigate to the “Hotkeys” tab and set your custom combinations. If you want to undo your decision, simply click the “Reset” button.
How to Add Schematics to Litematica?
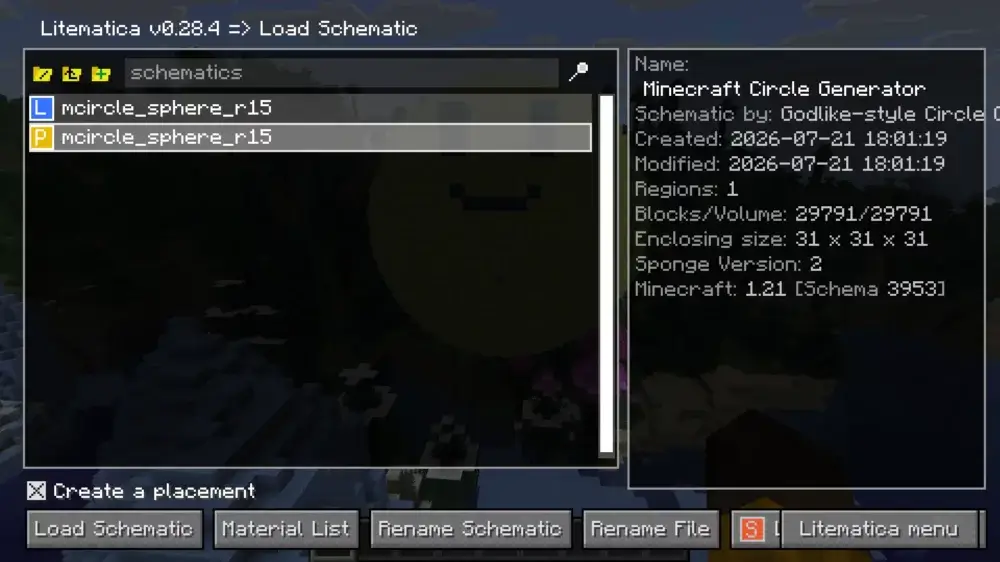
Once you’ve gotten acquainted with the interface, you may wonder where to put Litematica schematics. First, let’s review which file formats are compatible with this mod (consider that compatibility also depends on Litematica’s version):
- .litematic (format supported by Litematica 1.13 and later)
- .schem (old format)
You can download these files on different online platforms, such as PMC. Once you’ve received the schematic, put it into the .minecraft/schematics/ directory. Afterward, enter the game and load it via the Load Schematics menu (press M and choose Load Schematics). Consider that you need to use the M + G keybind (by default) to turn on ghost block rendering and see it in the game.
How to Work with Schematics in Litematica?
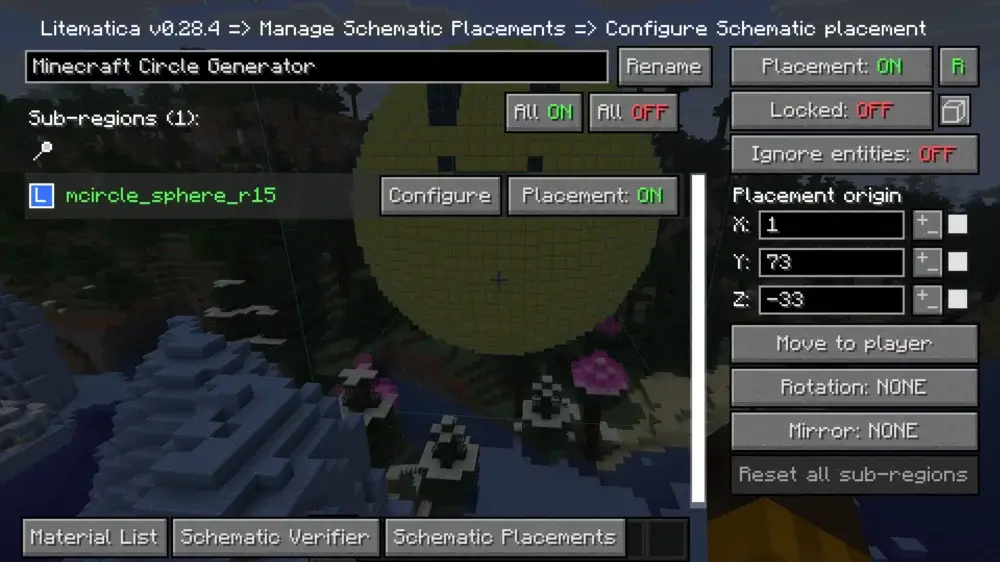
Although you know how to load schematics in Litematica, you probably also want to manipulate the loaded structures so you can perfectly locate them in your world. All in all, there are three ways to do it:
- Visit the Placement Configuration Menu by entering Litematica’s menu, choosing “Schematic Placements” and then “Configure” to change X, Y, Z coordinates and rotation.
- By default, you can access it by pressing Numpad Minus, which will open the GUI of the currently selected placement.
- Use the tool item when you are in the Schematic Placement tool mode. You can click with the tool to move the placement origin or use Alt + mouse scroll to move the placement in the direction you are looking.
Checking Material List
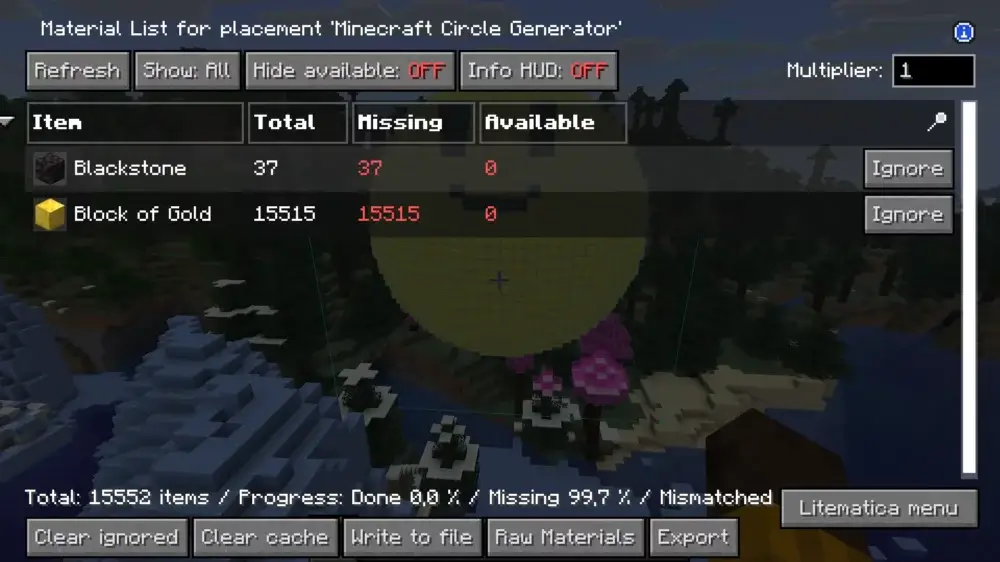
Finally, let’s find out how to use the Material List in Litematica. This is an extremely useful feature for players trying to recreate epic structures in Survival mode. Due to the Litematica Material List, you’ll know exactly how many resources you need to complete your building. Once you’ve loaded the desired schematic, press M + L to activate the Material List feature. It’ll display your progress, the total blocks needed, and the amount missing.
Godlike Minecraft Circle Generator for Litematica
What if you want to create your own structure but only have access to your browser? Well, that’s where Godlike Minecraft Circle Generator comes into play. You can use it directly in your browser to generate different structures, including circles, spheres, domes, and circular bases. So, how to use Minecraft Circle Generator with Litematica? Here are some tips:
1) Create a structure in the browser. Open Minecraft Circle Generator, create the desired structure (a sphere, a dome, or a cylinder), and enhance it using Paint or Erase tools.
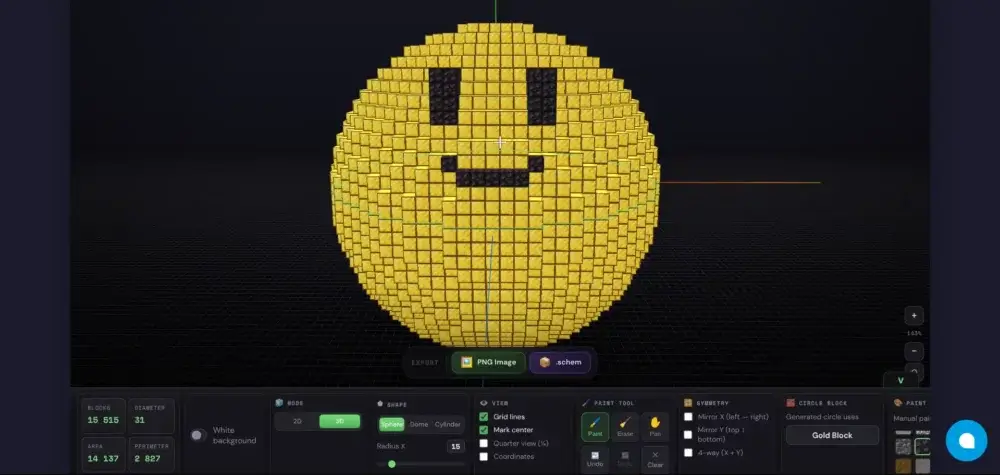
2) Download your structure. Press the .schem button to download your structure from our Minecraft dome schematic generator. Alternatively, you can download a PNG image to immediately show it to your friends.
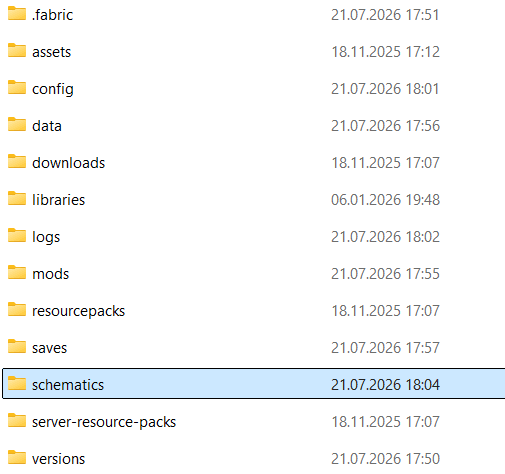
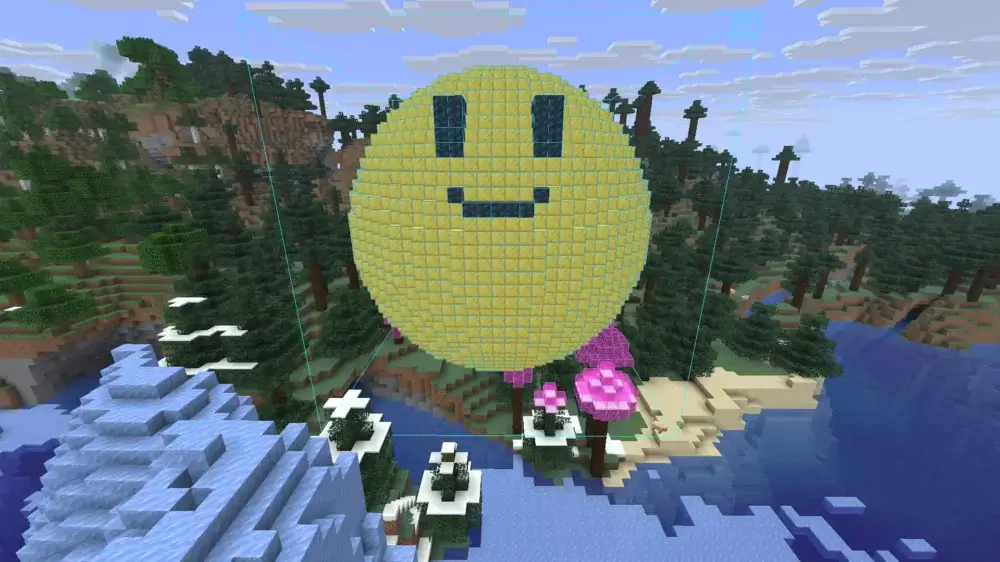
3) Place your structure in your Minecraft world. Put the downloaded file in the folder with other schematics and load it in Litematica. Now, you are ready to recreate your masterpiece in your Minecraft world.
Building with Godlike Circle Generator
Once you know how to use Minecraft Circle Generator with Litematica, it’s time to unleash your imagination and come up with a couple of epic projects. You can use this tool to create Litematica schematics of the following structures:
- Towers.
- Domes.
- Arenas.
- Circular bases.
- Beacons.
- Pixel art.
- Large decorative structures and mega-builds.
Unleash your imagination and create a Minecraft building blueprint of your dream in our online Minecraft schematic viewer. Decide which material you want to use as a base, select the most appropriate shape, choose its scale, and add details using other blocks from the game.
Litematica for Multiplayer Servers
Do you need Litematica on the server? This is a client-side Minecraft blueprint mod, which means you only need it installed on your PC. Moreover, in this case, Litematica will allow you to load and build schematics not only in your offline worlds but also while connected to a vanilla server. However, the way you can use it also depends on the server’s configurations:
- Survival server: If you play on a server with cheats disabled and only Survival mode available, you’ll be able to use Litematica’s holographic overlays and the Material List.
- Creative Server / OP Permissions: If you run your own Minecraft server or play in Creative Mode, you’ll also be able to use the “Easy Place” feature. In this case, Litematica automatically executes the server’s /setblock commands and places blocks for you.
Possible Litematica Issues in Minecraft
After installing the mod, you may face different issues, such as Litematica schematics not showing. So, let’s review the most common problems and their possible solutions in the table below:
| Issue |
Solution |
| Litematica schematic not showing |
- Open Litematica’s menu, click Load Schematics, select your file, ensure that the Create placement toggle is turned on, and click Load Schematic.
- Enable Main Rendering (M + G) and Schematic Rendering (M + R).
|
| Litematica not loading schematics |
- Ensure that your schematic file is in the correct folder (.minecraft/schematics/)
- Verify that you use a .litematic or older .schem file.
|
| Litematica doesn’t work |
- Ensure that you’ve downloaded the mod for your Minecraft version.
- Check whether Fabric, Fabric API, and MaLiLib are installed on your Minecraft version.
|
| Litematica keybinds not working |
- Verify that you have the correct version of MaLiLib installed.
- Delete the configuration file from .minecraft/config/litematica.json to reset the keybinds to their defaults.
- Ensure there are no mods causing keybind conflicts.
|
| Litematica missing dependency |
- If your game is crashing or not starting, you’re likely missing MaLiLib or have the wrong version installed.
|
| Some Litematica features aren't available on the server |
- You need to get the OP rights or play on Creative servers.
|
| Material List not showing up |
- Verify that the schematic is loaded into a placement and Easy Place is turned on.
- Adjust the infoHudOffset settings in the mod configuration to ensure that the list doesn’t cut off on your screen when it’s open.
|








 en | USD
 CHAT WITH GODLIKE TEAM