Before You Install Minecraft Forge
Welcome to another article in our “Minecraft Mods” series. Considering you’re reading this article, you’ve chosen Forge as your modloader, great choice!

Make your own FREE minecraft server
MINECRAFT FREE SERVER
In case you’ve stumbled upon this article by accident, here’s some context: this article explains what Forge is, how it came to be and how to install it. This article is also a part of our “Minecraft Mods” series of articles fully explaining everything you need to know about mods.
If after reading this article, you have any more questions – feel free to check out our previous general article.
What is Forge?
As it was briefly mentioned in a previous article – Forge is a modloader. In simple terms, it’s a middle man that makes modding Vanilla Minecraft possible, and therefore also allows you, as a player, to install and run mods. It’s a key requirement if you want to play Minecraft with mods.
Historical detour
Before jumping into the installation process, let's take a small detour and look at the history of Forge. In the early days of Minecraft, around 2010 - 2011, there were no modloaders. The only way to mod the game was to manually unzip the game’s core .jar files, drag in new lines of code, delete the old ones etc. This was known as “jar modding”. It was an extremely frustrating experience: it took lots of time and effort, and a lot of the time, players couldn’t make some mods work together due to compatibility issues(most of the time those mods tried to modify the same file, which caused problems and confusion in the game's base code).
Around that time, a couple of big mods were in development - BuildCraft and RedPower. The authors of those mods wanted them to properly work together and this is how the idea to create Forge came to be. At first, Forge was meant to be just a compatibility layer, but over time it grew into something bigger - a modloader. This tool truly revolutionized the community at that time, allowing for a large amount of mods to work properly together, and making modding in general a much less painful process than it used to be.
Installation process
Now, with the formalities out of the way, let’s dive into the installation process. The first step is to open Minecraft Launcher, choose the version of the game you want to mod and launch the game. This is important, as this first initial launch sets up game files, which will be essential for Forge installation.
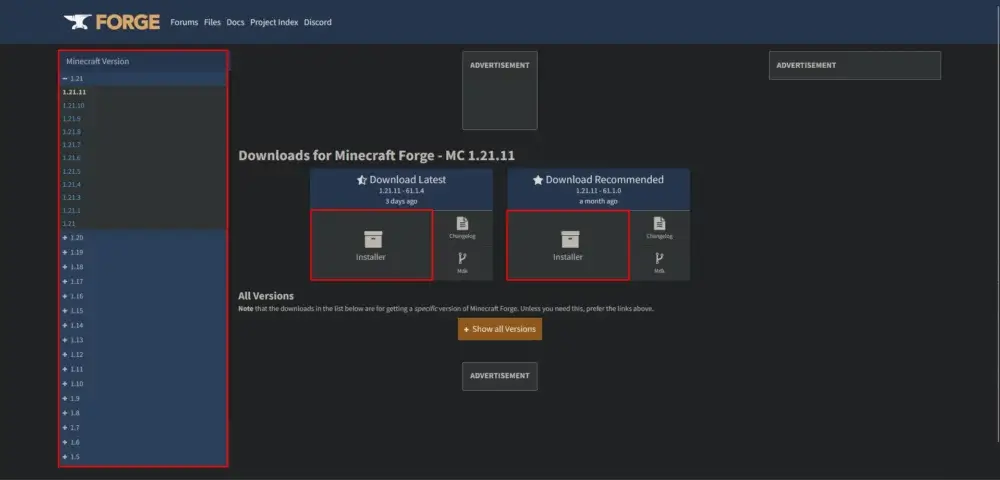
Next, go to the official Forge website, choose the same version of the game you’ve chosen in Minecraft Launcher and click download. You will be redirected to another page with ads, but don’t click anything yet. Wait a few seconds and then click the “Skip” button to proceed with the download.

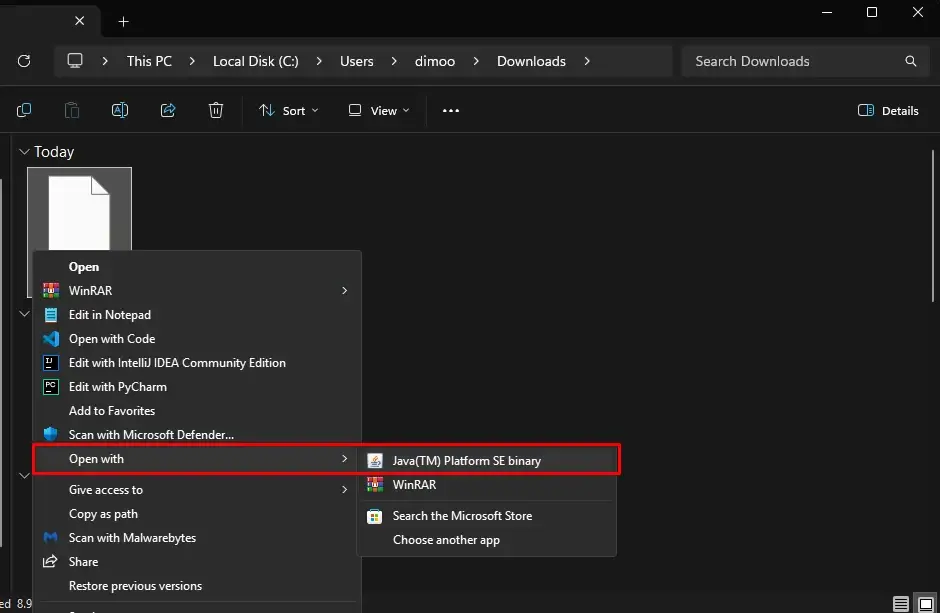
After downloading the Forge installer, open the directory you downloaded it to, right click the installer > “Open with” > “Java(TV) Binary SE”. If you don’t have an option to open the file with Java, you probably don’t have Java installed on your PC. It’s a minor issue, which can be solved with a simple “Install Java for Minecraft [Your game version]” google search. Alternatively, you can check out our detailed article on how to install Java.
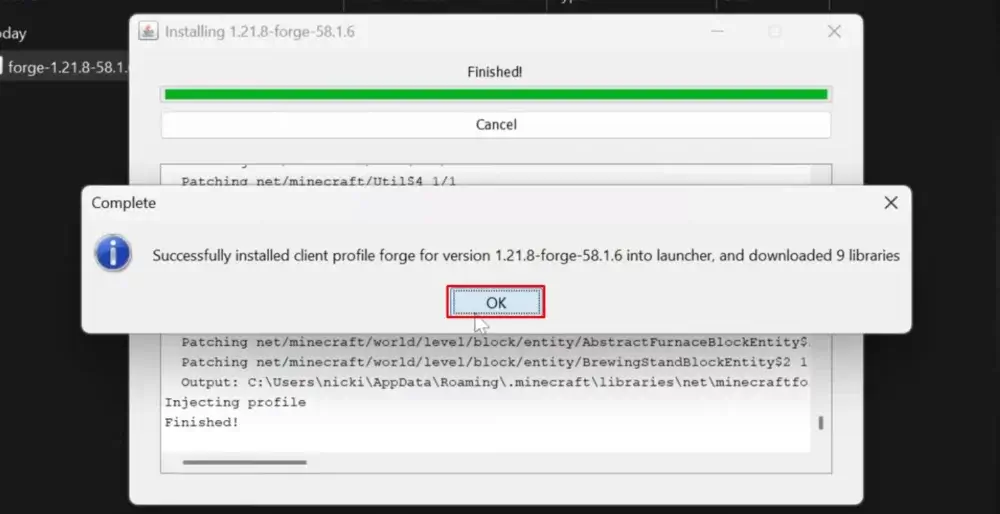
Then, when the installer opens, choose install client and click “OK”.
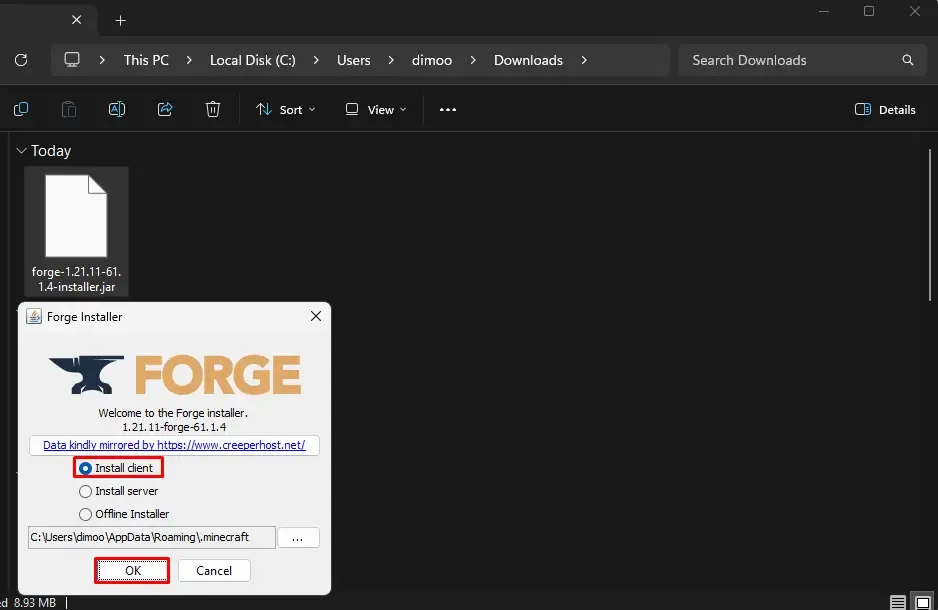
Wait a moment, and if everything goes smoothly, you should be greeted with the following imagery:
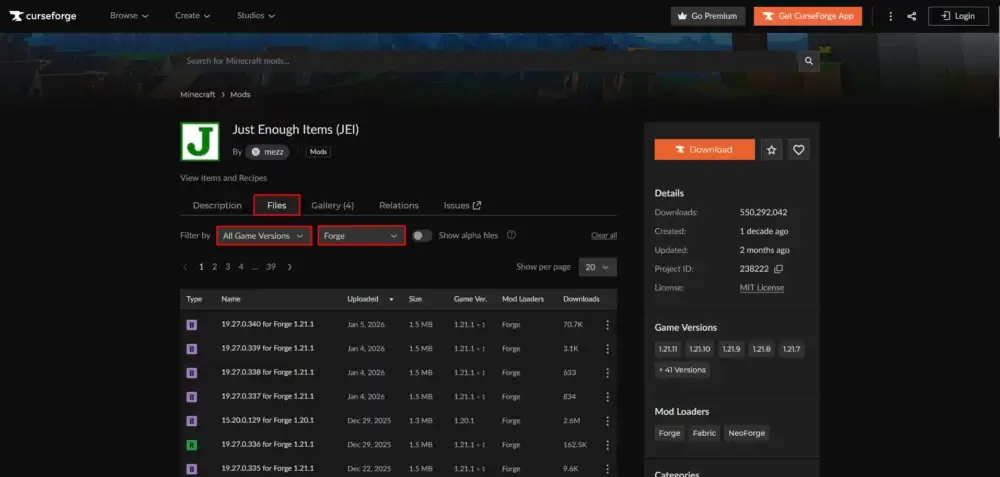
Once that is done, go to CurseForge(or any other trusted website) and download the mods themselves. Before downloading the mod files, make sure they are meant for Forge and match your game’s version.
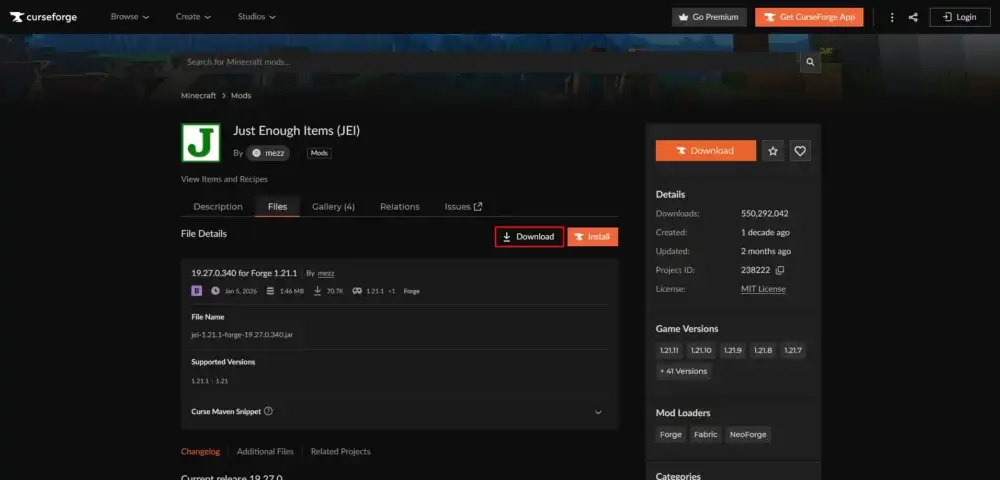
Click on the mod file you’ve chosen and hit the “Download” button, wait a moment until the file is downloaded. Make sure to download all the mods you want. You can always add new ones later, but it’s much easier to install them all in one go.
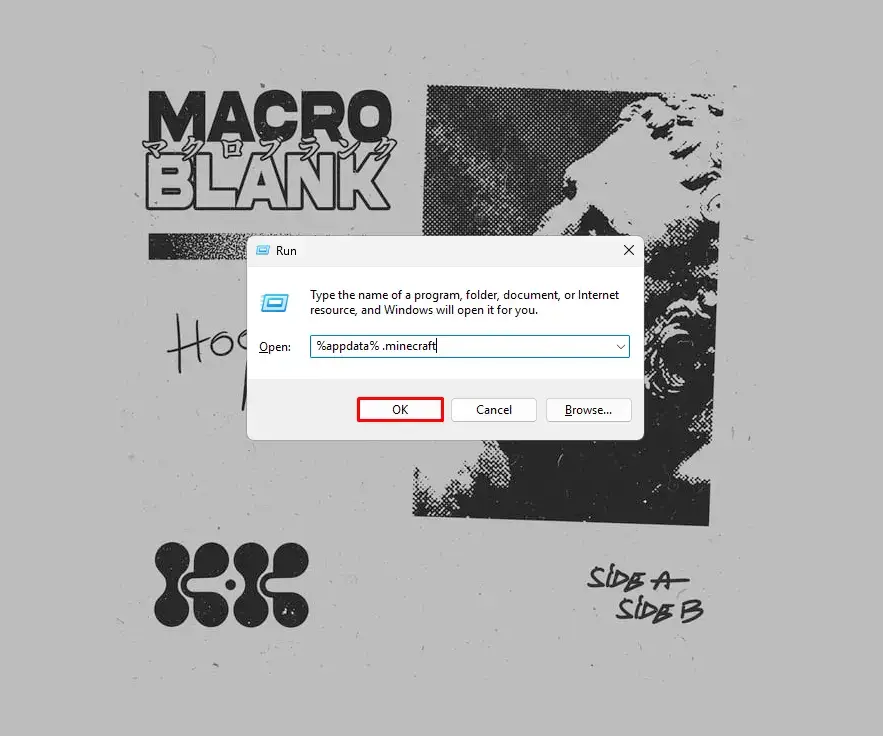
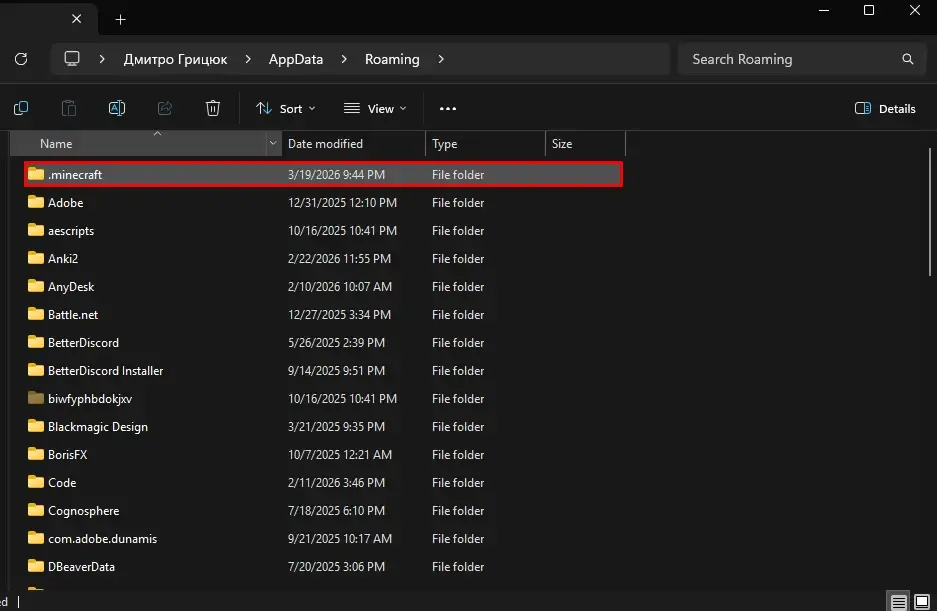
Once you have all the mods downloaded, press Win + R shortcut to open a “Run” window. Type in “%appdata% .minecraft” and hit Enter / “OK”.
In file explorer(which will automatically open upon running the previous command) navigate to a folder called “.minecraft”.
Inside that folder navigate to another folder called “mods”. If for any reason you don’t have this folder – not a problem. Just right click an empty space > New > Folder and name it exactly the same – “mods”.
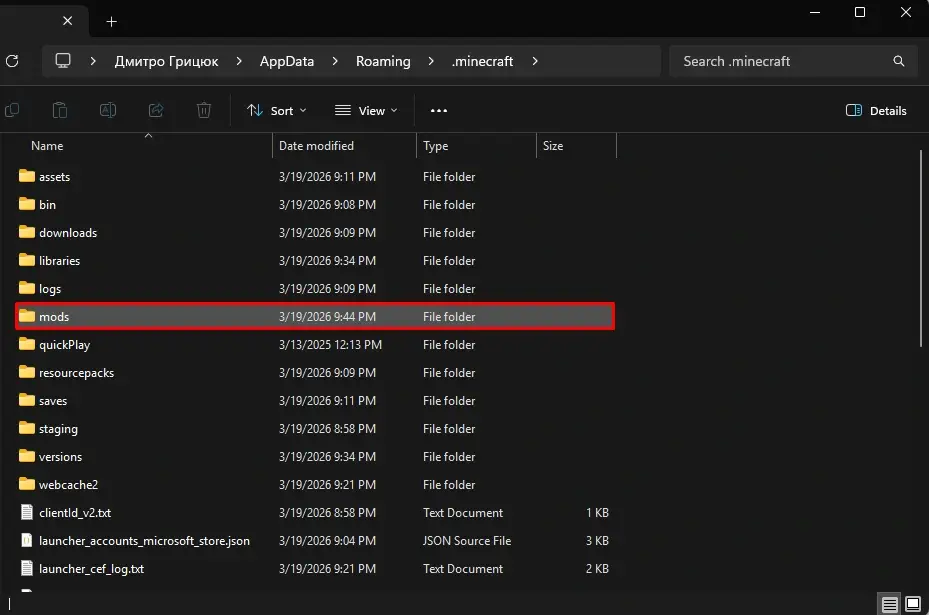
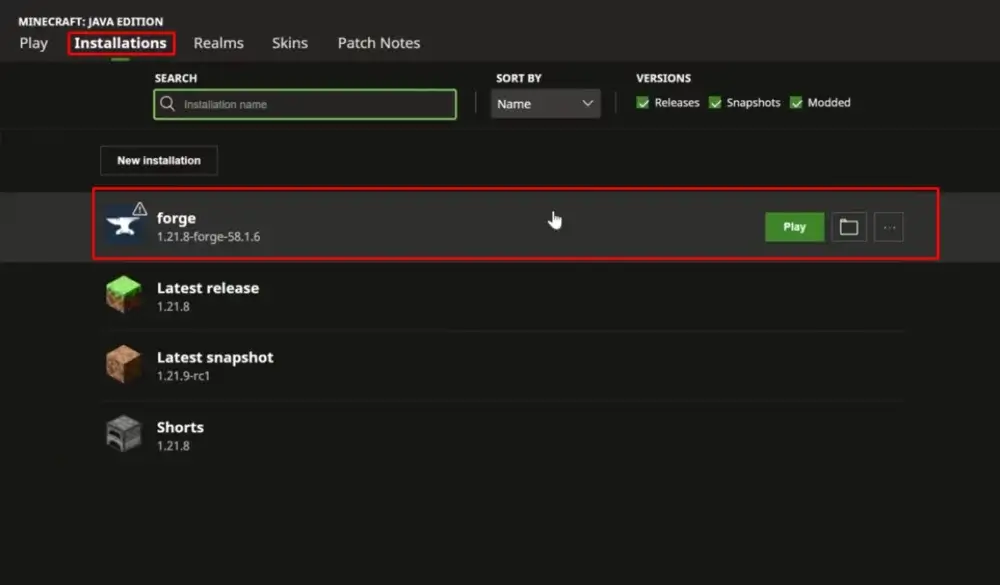
Then drag and drop all of the mods you’ve previously downloaded into the mods folder and you are just one step away from playing Modded Minecraft. Open Minecraft launcher, navigate to the installation menu and choose Forge Client instead of a normal game instance. Run it like usual and you are good to go!
Conclusion
We sincerely hope this guide on Forge installation was helpful, thank you for reading and good luck playing your brand new modded Minecraft!
 en
en