One-Click Modpack Installer from Godlike
Check the best Minecraft server hosting panel - whether you’re setting up a simple pack or running hardcore setups like RLcraft server hosting - and make sure that the modpack you want to install is on the 'Modpacks' tab . If the modpack is there, you can just click it and it will be automatically installed for you.
To do this, you need to select the version and click the install button


To see a list of available modpacks please visit our Modpack list page, on that page we also explain the process you have to follow if you want us to add a modpack to our One-Click Modpack installer.
NOTE
This tutorial can also be used to update your server mod pack, just replace the old files with the new generated files. Always take a backup before updating your server.
Downloading the server pack
You'll first need to find the modpack you wish to install. Downloads can be found on a variety of sites. Many modpacks and server packs can be found in the multiplayer category of CurseForge.

Make sure you select the multiplayer category, otherwise the modpack may not have a server pack version, and you will need to create the server pack yourself.
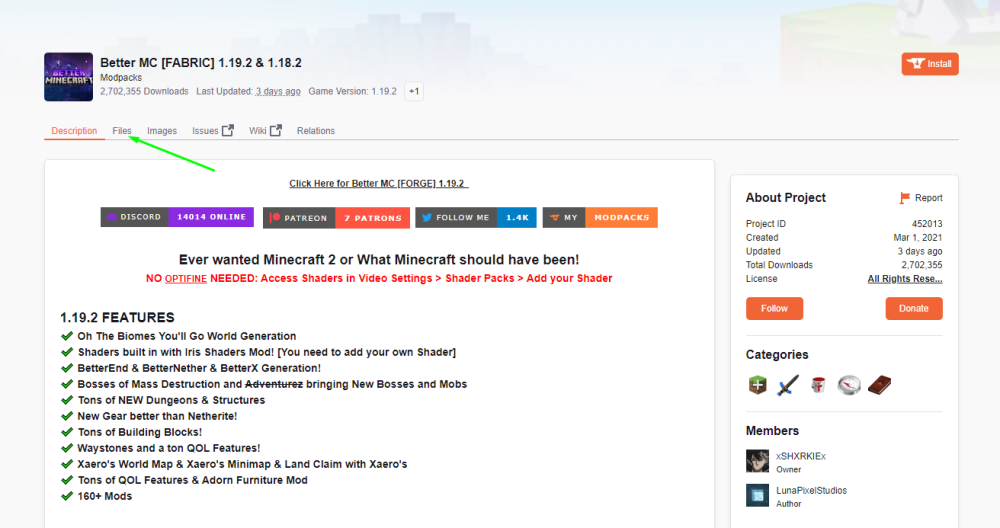
The first step would be selecting the modpack we want to install, in this tutorial we will use Better Minecraft Fabric version.

After selecting the modpack, click on the Files tab and scroll down to the "Additional Files" section. Here you will usually find the serverpack version of the modpack. This is the file we need, so click on the download button.
Do note that not all modpacks have a server pack, if they don't have a server pack you will need to install everything yourself.


After downloading the server pack, extract it on a folder. The extracted files will be similar to the ones we show below. We will need to run the Fabric installer to install Fabric on this server. This .jar is usually named "Fabric-x.xx.x-xx.x.x-installer.jar". Double click on the Fabric-installer.jar file to run it. But for the newest packs we have .bat or .ps scripts, in this case we have start.ps1, same as with jar file just double click on it.

NOTE
Some server packs already come with Fabric installed or require you to run a .bat or .ps file to download the mods and Fabric.
This tutorial only applies to server packs that don't come with Fabric installed. if the server pack comes with Fabric installed you just need to upload the files to your Godlike server and start the server with the Fabric .jar (not the one that says minecraft_server.jar).
If the server doesn't come with Fabric installed or a Fabric installer, it most likely comes with a .bat to download all the files, in this case just click on the .bat and it should start downloading the necessary files. Then you just need to follow the rest of this tutorial to upload the files to your Godlike server and start it. :::
After starting the start.ps1, you need to type "Yes" in the command line.

The next step is you need to accept EULA. So type "I agree" and wait the installation ends

After successfully installing Fabric, you will need to select all files in the directory and compress them. It's recommended you use a tool like WinRar to compress the files since Windows default compression option doesn't usually work with the panel.

After compressing the files, you will need to upload the compressed/archived file to your Godlike server. But first you have to delete all your files in your Godlike server, to do this you can go to the Godlike Panel, click on file manager, select all the files and click on Delete.
Server packs contain a lot of files, so you will need to connect through SFTP to upload the archived file. You can follow our guide on How to connect through SFTP. After you connect through SFTP, you can just drag and drop the .zip to the SFTP server.

We are almost finished! Now you can go to the console page, and start the server. But don't leave this page! You will be prompted to select the .jar to be used to start the server. You will need to select the Fabric .jar, but not the one that says "Installer", just select the one that looks like this: Fabric-1.19.2-x.x.x.jar .
NOTE
Some servers don't name their .jar "Fabric", in some cases it may have the name of the modpack like jurassic_reborn.jar, in this case just select that .jar to start the server. NEVER select the .jar that it's named Minecraft_server.jar (it may contain the version # on the name). This .jar will just start a Vanilla server and you will need to reinstall the server pack again.
The last step is to accept the EULA, just click on the "Accept" button and the server will start.
That's all! You have successfully installed a server pack on your Godlike server.

 en
en
 CHAT WITH GODLIKE TEAM


